Showing posts with label Norwegian. Show all posts

Friday, January 13, 2012

Lefse Time at my house!

A couple of months ago I got a bug in my head to make Lefse. What is lefse, it is a traditional soft, Norwegian flatbread. Lefse is made out of potato, milk or cream and flour, and cooked on a griddle. Special tools are available for lefse baking, including long wooden turning sticks and special rolling pins with deep grooves. So guess what I got for my birthday...you got it... a deluxe Lefse making kit from Lefse Time.I guess my husband really wanted homemade lefse! The kit came fully loaded everything including the griddle and a booklet Making Lefse in 8 Easy Steps.  Now I was ready!
  Lefse Traditions Kit
So I embarked on my first Lefse making journey . It really wasn't that bad now that I had all the official Lefse making tools and some tips from a group of Norwegian ladies on Face Book..thank you NT members for the warnings!

Lefse in 9 Easy Steps...more or less...I added an extra!

Aunt Charlotte's Lefse recipe ( From Lefse Time )


4 cups riced potatoes
1/4 cup butter
1/2 cup heavy whipping cream
2 tsp sugar
1 tsp salt
1 1/2 cups flour

Step 1: Boiling your potatoes

Peel 2 to 2 ½ lbs of russet potatoes. Rinse and cut potatoes in half and then quarters. It’s important that your potato pieces are of similar size so they are all cooked through at the same time. Place potatoes into a large pot of salted water and boil until fork tender. (You should be able to pierce potatoes with a fork easily.) This should give you 4 cups of riced potatoes equaling 12 lefse rounds, you can easily double this recipe for a larger batch. But if it is your first attempt do yourself a favor and start small!


Step 2: Ricing your potatoes

When the potatoes are done boiling, drain into a large colander. Drain well and rice. Don’t waste a lot of time here, your potatoes need to be warm to melt the butter in the next step. To help keep your potatoes warm, rice them into the empty pot you used for boiling. Rice all your potatoes and then measure out 4 cups (lightly packed) into another large bowl. Note: Make your ricing a bit easier and only fill the ricer basket 1/2 to 2/3’s of the way full. And take it slow, a lot of pressure all at once and the potatoes will come out too fast and all over. You don't want to get a potato burn!

Step 3: Well just step 3

To your 4 cups of riced potatoes, add 1/4 cup butter in pats so it melts in evenly. Stir a few times to get the butter mixed in well. Cover and refrigerate overnight. If you would like to cook the same day you can cover the potatoes with a towel and set aside on your counter top until they are completely cooled. Or to cool faster, place uncovered in refrigerator for 30 minutes, pull out and stir, refrigerate 30 minutes longer, stir. Keep repeating until cooled. Even faster? Use the freezer. Same process: freezer, stir, freezer, stir until cool.
 or so the directions say. I made my potatoes the night before better safe than sorry!

Step 4: Get your lefse making area set up!

To your This is the step they left out of the booklet! Set up your work area and cover your table or area with a plastic cloth of some sort... making lefse requires a  lot of flour and sometimes a lot of flour ends up all over the place!


Put lots of flour on your lefse board and your rolling pin!
Preparation is the key to success with rolling. Round pastry boards are great for rolling lefse. They have size guides to indicate how large your sheets are and can be a great guide to round sheets. Prep your pastry board by spreading out about 1/4 cup of flour into a circle just a bit bigger than the sheet of lefse you intend to roll. Rub the flour in thoroughly to your pastry cloth. You will need to lightly rub in a bit of flour onto your pastry board between each sheet, paying special attention to the center as it tends to build up the most moisture and could cause sticking. remember this it is important!!!!!
 
Prep your rolling pin by working flour into every groove of your pin. This can be sped up by rolling your pin directly into flour. For example, place a cup of flour onto a tray and roll your pin back and forth through the flour. Be sure to rub flour in on any missing spots and to rub in more flour between each lefse sheet. You can also use a rolling pin cover; it functions the same as a pastry cloth when prepped with enough flour.
Step 5: Mixing

To your cooled potatoes add the 1/2 cup whipping cream, 1 tsp salt, 2 tsp sugar and 1 ½ cups flour. If you have refrigerated overnight, break up the potatoes into small crumbles before adding the remaining ingredients. Once added, stir until most of the flour is worked in (loose crumbles). Then knead (like bread dough) 10 - 15 times. You can knead right in your mixing bowl. You should feel your dough come together into a smooth dough.


Step 6: Making the patties

Using a 1/4 cup measuring cup, scoop out patties onto a tray or cookie sheet, I ended up with 18 patties. Then shape each patty much like you would a hamburger patty – gently knead between your hands, roll into ball and press flat. It is very important that the edges of your patties are smooth with no cracks. Those small cracks will develop into bigger cracks as you roll. Set your patties aside to rest while you turn on your lefse grill and let it heat to 500 degrees. Note: A 1/4 cup patty rolls into a 12 inch thin round ;if you like thicker lefse roll to 10 inch round. Also you can do 1/3 cup patties which will roll into a nice and thin 14 inch round. If you like thicker lefse roll only to 12 inches.
Place patties on a cookie sheet and bring over to your work area.

Step 7: Rolling

Make sure there is lots of flour on your board! To begin rolling,  flour your patty on both sides then place it down at the center of your prepped pastry board. Gently roll forward and back using mostly the weight of the pin, only a very slight downward pressure so that your patty becomes a small oval. Then either rotate your board slightly or change your angle and roll forward and back. Continue rotating or switching your angles so that you keep your lefse round and of even thickness. Keep rolling until you have achieved the size of lefse you’d like.

I rolled mine thin that's how we like them!

Step 8 : Transferring your rolled lefse to the griddle!

Using a lefse turning stick, slide the stick under the lefse sheet (middle of sheet) making sure to keep the tip of the stick down. Lift gently from the board and move quickly to the lefse grill. Matching the edge of your lefse to the edge of the lefse grill, lay the lefse down and “unroll”. Again you will need to move quickly, and in one smooth motion. If you miss the grill and part of your lefse is hanging off, let it cook for 10-15 seconds, then using a hot pad, lay it on top of the cooking portion of lefse and gently pull the lefse that is hanging off onto the grill. Another method to transfer is to flip the edge of a sheet over the stick and roll in a couple turns and then lift up, again match your lefse to the grill, lay down and unroll.
They make this step seem complicated but it's pretty easy just make sure you have the lefse stick flat side down...I found this out the hard way! Sorry no pics of this step because I couldn't multi task this one..

Step 9 : Grilling and chilling..as Bobby Flay would say!

Cook the first side 30 seconds, give or take. The surest way to know if your lefse is ready to flip is to watch for cues. Your sheet should bubble up and when you peek under the edge there should be light golden brown spots. Then run your lefse stick down the middle, lift and turn over using the same method mentioned in step 7. Cook the second side until you see the same signs. The second side will cook considerably faster than the first side as the sheet has been heated through. From there simply transfer your lefse to lefse cozies or towel (do not use towels laundered with scents). Wipe off excess flour on your lefse grill with a dry cloth between each sheet to avoid burnt flour on your sheets.
While your first lefse is cooking you can start to roll out the next one but make sure you re-flour your board well, especially the middle before you roll out your next lefse.
Repeat the above steps till all your patties are cooked.
Let about 10 to 12 sheets stack, cover with a cozy or towel, then set them aside to cool. If you see that your sheets have a bit too much flour, wait until cooled and dust off.


When all your lefse are cooked its clean up time and lefse eating time. I served mine with dinner that night! My kids...like to spread butter on the lefse, sprinke it with sugar than roll it up and eat it!

You can also,your lefse is completely cooled, fold in half, then half again and store in zip-top freezer bags. They will keep in the freezer for 6 months or more.


Pin It

Sunday, December 18, 2011

Kransekake Sticks another Bakers Odyssey!

I belong to a few Norwegian groups on Facebook. They are groups where people share their heritage and their recipes. This was posted on a site and I knew I had to try them. I love Kransekake and add the dipping of chocolate and I was sold. So I set out to make them. What I thought would be a relatively simple task....Baking is my thing... has turned into a journey of sorts. 

The recipe is so simple just 3 ingredients what could go wrong?  Here is the Recipe from M.F. Scott as posted...

****Beware read this whole article before trying these cookies...learn from my mistakes!!!!


Kransekake sticks


1 lb finely ground almonds

1 lb powdered sugar

3 egg whites

Mix the ingredients into a dough and place in the fridge overnight.

Roll the dough so that it's the size of a finger and cut into 3 inch long sticks

Bake for ten minutes at 350 degrees.

Once they've cooled down dip half of the stick into melted dark chocolate.

* Sometimes, after dipping in the chocolate, I'll have extra ground almonds that I'll dip the chocolate end into, just makes them a little more festive.

So I whipped out my handy food processor and ground those almonds up to what I thought was finely ground. And stuck it in the fridge over night.
 

The next day I'm all excited to get started with rolling these puppies out...I was dreaming of Kransekake all night. So I roll them out about the size of a finger...my index finger seemed like a good choice cut them to  3 inches... put them on a cookie sheet and poped them into the oven.


Now I've seen and eaten Kransekake sticks before so I know what they look like so when I opened the oven to take the cookies out I almost died... sorry I don't have a pic of this I was too much in shock.. My cookies had expanded soo much they were stuck together and all strangely shaped... ugh! I guess I picked the wrong finger. So the next batch I decided to roll out much thinner... the size of my pinkie finger and keep the cookies much further apart.
 

I put them in the oven again. This time they look a bit better but I know they still don't look like the Kransekake sticks I've seen.


But they tasted delicious (my husband and son ate the first sheet  no chocolate needed)...so I finished up the dough and figured once I dip them in chocolate I could hide some of the funny shapes and like I said they tasted delicious!

Now another person on the site also tries the recipe and posts a picture of her cookie asking if that is how they are supposed to look. And what do my eyes see... squiggly cookies that look like mine. So i say to myself OK Christine something is not quite right. Mind you it's 11:00 PM and I decide to search the internet to see what the heck is going on, is it the recipe..but they taste great...so I search the net to see what I can find.

This video sent me on my next quest:
A Baker's Odyssey "Kransekake" Recipe


OK so now I know what I did wrong what I thought was finely ground almonds were not fine enough. I don't own one of those nut grinders but I was sure in my arsenal of kitchen gadgets I must have something that will grind up those almonds fine enough! So out comes the Kitchen Aid and the special food grinder attachment..


In go the almonds and out comes...not what I'm looking for...and the grinder jammed up..oops! Ok what do I try next out comes the Kitchen Aid coffee grinder thin I bought for grinding up spices...


Another no go the results were worse than the food grinder and mind you its now 1:00 AM... my family is trying to figure out what the heck is she doing down there at 1 in the morning. So I go an view the video again...hum I think to myself I have a Pampered Chef cheese grinder that  sort of looks like part of that nut grinder thing so into the closet I go and pull that baby out!


What did I have to lose at this time of night and it was the last thing in my grinding arsenal! So in went the almonds and low and behold out came.... finely ground almonds... woo whoo!....maybe not as fine as the video but closer than anything I was able to achieve with anything else!

Now I'm thinking to myself I don't think Pampered Chef had almonds in mind for this greater..I hope it holds up..and am I going to do a pound of almonds this way? Well the answer was no way so I decided to halve the recipe. Buy the time I was done with the dough it was 2:00 AM but I was happy!


Kransekake Sticks

1/2 lb finely ground almonds (almost like a powder see pic above)

1/2 lb powdered sugar

1.5 ounces egg whites ( the whites from 1 1/2 eggs)

Optional about 9 oz. of good quality chocolate to dip the ends in.
*****************************************************

Finely grind the almonds so they are almost...I did say almost.... like a powder.
Add the ground almonds to the powdered sugar and mix buy hand till combined. Then put in the bowl of your food processor ...turn on and add the egg whites... process till combined. Put in a covered container and refrigerate over night.

Taking small portions of dough...Roll so that it's about the thickness of a pencil and cut into 3 inch long sticks. Place on parchment lines baking sheets..do not put them too close together!!!!


Bake for 6-7 minutes at 350 degrees. Start rolling out your next sheet while your first pan is baking.

Remove from baking pan to cooling rack.


As you can see they are still a bit squiggly but look sooo much nicer when you get the nuts ground to the right consistency!

Once they've cooled down  you candip half of the stick into melted dark chocolate. I am fussy about my Chocolate being an Official Chocoholic so I used Lindt for these I like the taste and consistency of the chocolate when it is melted.


Chop up the chocolate and melt in the microwave. I do  1/2 the chocolate at a time. Zap it for 30 seconds them mix and another 30 seconds mix and you should be good to go!


Once the chocolate has hardened store in an airtight container till ready to eat. This recipe even though it was 1/2 of the original made 50 cookies!

Also... if you are going to freeze them do not dip in chocolate...I did this and they get a blush on the chocolate..live and learn!

 A side note from the owner of the original recipe:
* Sometimes, after dipping in the chocolate, I'll have extra ground almonds that I''ll dip the chocolate end into, just makes them a little more festive.

Good Luck on your Kransekake Odyssey!!!!!!!


Pin It

Friday, December 2, 2011

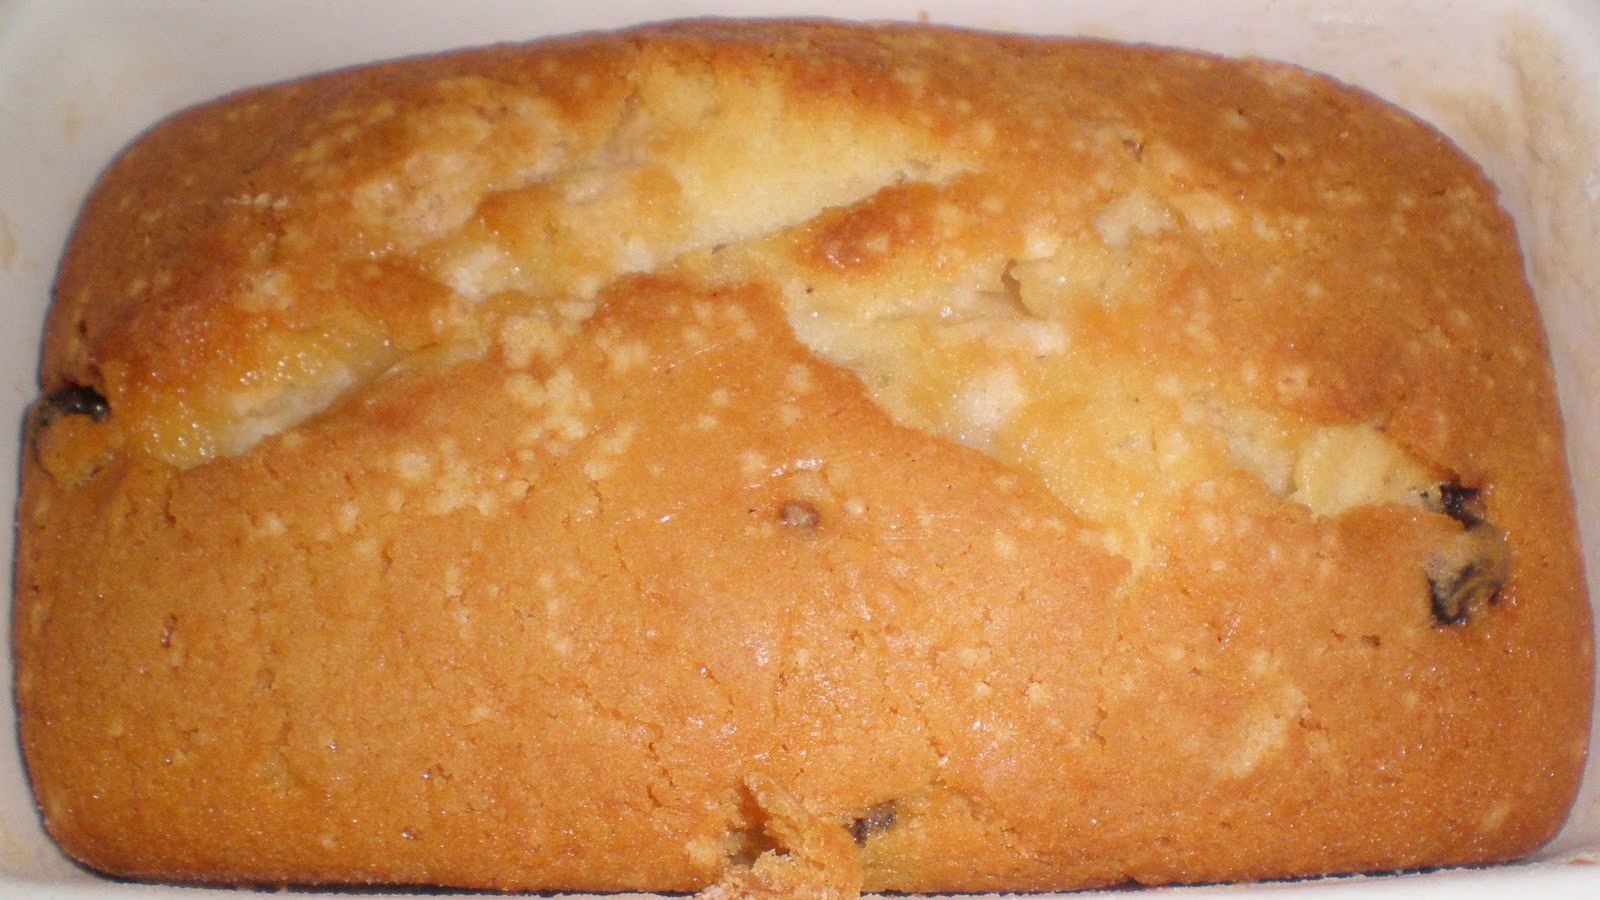
Sosterkake

Well I'm busy writing this post late at night because I made a big oops! While at the Son's of Norway meeting tonight a member asked for my Sosterkake recipe. No problem I tell her(that's you Janet O) I'll mail you the link to my blog the recipe is on there. Well low and behold I never posted it so Janet O. this is for you!


Sosterkake

Ingredients:


1 cup butter (room temp/softened)
2 eggs

3 cups flour

2 cups sugar

12 ounces evaporated milk

2 teaspoons baking powder

1 1/2 teaspoons cardamon

1 - 1 1/2 cups dried fruit
( traditionally raisins but I make up my own variations such as cranberries and apricots,wild blueberries, currents or golden raisins the choice is yours)

also optional is 1 teaspoon almond extract

Directions:

Pre-heat oven to 350 degrees.

Grease and flour 2 bread pans.

Cream together butter eggs and sugar till well mixed.

Add flour and baking powder mix till well blended.

Slowly add the evaporated milk.

When all combined add you choice of dried fruits...if you are using large fruits like apricots cut them up into small pieces.

Bake for 1 hour.

Cool and enjoy!!!


Sunday, November 27, 2011

Sandkaker A Traditional Norwegian Christmas Cookie

This is my first try at making Sandkaker,a traditionl Norwegian Christmas Cookie. They are like mini tarts and are filled with flavored whipped cream whan ready to be eaten. We always made Cloudberry Cream to fill ours with or you can eat them just as they are!


This recipe is from my mother-in-law...it was one of the cookies she usually made but since she is no longer with us I have to start baking them for my family. To make these cookies you need Sandkaker molds also known as mini-tartlet pans. I'm not sure where mine came from...but I'm sure you can find them somewhere on the net. My mother-in-law had bright shinny ones...mine are non-stick and work great! I had bought them years ago to make mini-tarts...glad I did!


There are six different shapes of tins in my set or sets...not sure if I have more than one set but I do have alot!


SANDKAKER


2 sticks of butter room temperature

1 cup sugar

2 1/2 cups flour

1 egg

1 teaspoon almond extract


Pre-heat oven to 350 degrees.

Cream together butter and sugar till light and fluffy. Add egg and almond extract and mix till combined. Add flour gradually ..mix well. Refridgerate dough for about an hour.

Using a small cookie scoop, scoop out a ball of dough.


Press into mold making sure its not too thick on the bottom.


When your molds are filled put them on a cookie sheet and bake from 12-15 minutes. I always turn my cookie sheets 1/2 way through cooking time for more even baking. They should be slightly browned around the edges.


Remove the tins/cookies from the cookie sheet and put them on a cooling rack upside down. Let them cool for about 4 minutes tap bottoms lightly with a knife and cookies should come right out.


If you don't have many molds you will have to wait for the molds you used to compleatly cool before you do the next batch so make sure you have plenty of molds!

Store in an airtight container or put in the freezer till you need them. Makes about 40 cookies.

Links to molds:

Shinny Molds

More shinny molds

Non stick mold set

Wednesday, November 9, 2011

Norwegian Krumkake Cookies

One of the first Norwegian cookies I made after marrying a Norwegian was Krumkake. The recipe was given to me by his Mom. Krumkake is a waffle cookie made of flour, butter, eggs, sugar, and cardamon. They are traditionally made during the Christmas season but I make them for special occasions and they are always a hit.


You do need a  special decorative two-sided  Krumkake iron ,similar to a waffle iron, to make these delicious cookies. It is well worth the investment...I've had mine for years... I've gone through many heart waffle irons but my krumkake iron takes a lickin and still keeps on ticken!


Krumkake

5 eggs
1 cup sugar
1 cup melted and cooled margarine ( yes that's what I said trust me!)
1 cup flour
cardamon to taste

In a bowl or 4 cup measuring cup (that's what i use), beat the eggs.

Gradually add the sugar and mix well.

Gradually add the margarine and mix well.

Add the flour slowly then cardamon ( I don't measure mine I go by smell but maybe about 1/2 teaspoon)

Now cover the batter and put it in the fridge for about 1/2 hour.

Plug in and heat up your iron, be careful it doesn't get too hot or your first two krumkake will be burnt...it's happened to me many times. Using a regular old teaspoon from your silverware drawer,spoon batter onto the center of the iron. Close iron, squeezing handles together  to spread the batter. You don't want the batter to squeeze out, but if you put on the right amount it shouldn't happen. You don't want fat Krumkake!


Now if you listen to the directions from your Krumkake iron they tell you to watch the light when it either goes on or off your krumkake are done...I go buy the amount of steam coming out of the iron. When you first close and squeeze the handles together lost of steam come out when it slows down I open up the iron they are usually just right.


Moving quickly take the cookie from the Krumkake iron and roll quickly (while hot) around the Cone Form. I have two since it makes two at a time and invest in wooden cones the plastic ones are the pits!
Start your next two cookies, while they are cooking,(it doesn't take long) pull the first two cookies off the cones and place on paper towels to cool off.


Makes between 5 and 6 dozen krumkake.


When I serve my krumkake I whip up some heavy cream and add Cloudberry Jam or Seedless Raspberry or what ever flavor you like. Chocolate is really great too!
 
Links for Krumkake irons(you really want a non-stick one!): http://www.bedbathandbeyond.com/product.asp?sku=17849727&utm_source=google&utm_medium=organic&utm_campaign=shopping
 
http://www.sears.com/shc/s/p_10153_12605_SPM5749862403P?sid=IDx20101019x00001a&ci_src=14110944&ci_sku=SPM5749862403
 
http://www.lefsestore.com/electrickrumkake.html