I found this recipe a few years ago, of all places, on food network. I wanted to try more Scandinavian cookies for Christmas.They sounded interesting and something different so I decided to give them a try. They have been on my list of Christmas cookies since.
Kringla Swedish Wreaths
2 sticks of butter Softened
1/2 cup sugar
2 egg yolks
2 1/2 cups flour
Egg wash (whisked egg whites)
Cream the butter, sugar and egg yolks in a medium bowl. Blend in the flour. Gather the dough into a ball , wrap in plastic wrap and chill.
After dough has chilled ,Preheat the oven to 350 degrees. Line cookie sheets with parchment paper. You'll be glad you did!
Using a small cookie scoop, scoop out a round ball, not too big. Roll out between about 5-6 inches long and 1/3-inch thick. At this point they can be either formed into a circle and twist or knot the ends. Continue until all the dough has been used.
Carefully brush each cookie with the egg white wash, don't be too sloppy with the wash you don't want your cookies to stick. Sprinkle with parl sukkar (pearl sugar) and bake for 10 to 12 minutes, until just set, not browned. I rotate the cookie pan 1/2 way through the cooking time for even baking. Remove carefully from cookie sheet right away to cooling rack.
Store in airtight container or freeze.
Showing posts with label desserts. Show all posts
Monday, November 28, 2011
Sunday, November 27, 2011
Sandkaker A Traditional Norwegian Christmas Cookie
This is my first try at making Sandkaker,a traditionl Norwegian Christmas Cookie. They are like mini tarts and are filled with flavored whipped cream whan ready to be eaten. We always made Cloudberry Cream to fill ours with or you can eat them just as they are!
This recipe is from my mother-in-law...it was one of the cookies she usually made but since she is no longer with us I have to start baking them for my family. To make these cookies you need Sandkaker molds also known as mini-tartlet pans. I'm not sure where mine came from...but I'm sure you can find them somewhere on the net. My mother-in-law had bright shinny ones...mine are non-stick and work great! I had bought them years ago to make mini-tarts...glad I did!
There are six different shapes of tins in my set or sets...not sure if I have more than one set but I do have alot!
SANDKAKER
2 sticks of butter room temperature
1 cup sugar
2 1/2 cups flour
1 egg
1 teaspoon almond extract
Pre-heat oven to 350 degrees.
Cream together butter and sugar till light and fluffy. Add egg and almond extract and mix till combined. Add flour gradually ..mix well. Refridgerate dough for about an hour.
Using a small cookie scoop, scoop out a ball of dough.
Press into mold making sure its not too thick on the bottom.
When your molds are filled put them on a cookie sheet and bake from 12-15 minutes. I always turn my cookie sheets 1/2 way through cooking time for more even baking. They should be slightly browned around the edges.
Remove the tins/cookies from the cookie sheet and put them on a cooling rack upside down. Let them cool for about 4 minutes tap bottoms lightly with a knife and cookies should come right out.
If you don't have many molds you will have to wait for the molds you used to compleatly cool before you do the next batch so make sure you have plenty of molds!
Store in an airtight container or put in the freezer till you need them. Makes about 40 cookies.
Links to molds:
Shinny Molds
More shinny molds
Non stick mold set
This recipe is from my mother-in-law...it was one of the cookies she usually made but since she is no longer with us I have to start baking them for my family. To make these cookies you need Sandkaker molds also known as mini-tartlet pans. I'm not sure where mine came from...but I'm sure you can find them somewhere on the net. My mother-in-law had bright shinny ones...mine are non-stick and work great! I had bought them years ago to make mini-tarts...glad I did!
There are six different shapes of tins in my set or sets...not sure if I have more than one set but I do have alot!
SANDKAKER
2 sticks of butter room temperature
1 cup sugar
2 1/2 cups flour
1 egg
1 teaspoon almond extract
Pre-heat oven to 350 degrees.
Cream together butter and sugar till light and fluffy. Add egg and almond extract and mix till combined. Add flour gradually ..mix well. Refridgerate dough for about an hour.
Using a small cookie scoop, scoop out a ball of dough.
Press into mold making sure its not too thick on the bottom.
When your molds are filled put them on a cookie sheet and bake from 12-15 minutes. I always turn my cookie sheets 1/2 way through cooking time for more even baking. They should be slightly browned around the edges.
Remove the tins/cookies from the cookie sheet and put them on a cooling rack upside down. Let them cool for about 4 minutes tap bottoms lightly with a knife and cookies should come right out.
If you don't have many molds you will have to wait for the molds you used to compleatly cool before you do the next batch so make sure you have plenty of molds!
Store in an airtight container or put in the freezer till you need them. Makes about 40 cookies.
Links to molds:
Shinny Molds
More shinny molds
Non stick mold set
Wednesday, November 9, 2011
Norwegian Krumkake Cookies
One of the first Norwegian cookies I made after marrying a Norwegian was Krumkake. The recipe was given to me by his Mom. Krumkake is a waffle cookie made of flour, butter, eggs, sugar, and cardamon. They are traditionally made during the Christmas season but I make them for special occasions and they are always a hit.
You do need a special decorative two-sided Krumkake iron ,similar to a waffle iron, to make these delicious cookies. It is well worth the investment...I've had mine for years... I've gone through many heart waffle irons but my krumkake iron takes a lickin and still keeps on ticken!
Krumkake
5 eggs
1 cup sugar
1 cup melted and cooled margarine ( yes that's what I said trust me!)
1 cup flour
cardamon to taste
In a bowl or 4 cup measuring cup (that's what i use), beat the eggs.
Gradually add the sugar and mix well.
Gradually add the margarine and mix well.
Add the flour slowly then cardamon ( I don't measure mine I go by smell but maybe about 1/2 teaspoon)
Now cover the batter and put it in the fridge for about 1/2 hour.
Plug in and heat up your iron, be careful it doesn't get too hot or your first two krumkake will be burnt...it's happened to me many times. Using a regular old teaspoon from your silverware drawer,spoon batter onto the center of the iron. Close iron, squeezing handles together to spread the batter. You don't want the batter to squeeze out, but if you put on the right amount it shouldn't happen. You don't want fat Krumkake!
Now if you listen to the directions from your Krumkake iron they tell you to watch the light when it either goes on or off your krumkake are done...I go buy the amount of steam coming out of the iron. When you first close and squeeze the handles together lost of steam come out when it slows down I open up the iron they are usually just right.
Moving quickly take the cookie from the Krumkake iron and roll quickly (while hot) around the Cone Form. I have two since it makes two at a time and invest in wooden cones the plastic ones are the pits!
Start your next two cookies, while they are cooking,(it doesn't take long) pull the first two cookies off the cones and place on paper towels to cool off.
Makes between 5 and 6 dozen krumkake.
When I serve my krumkake I whip up some heavy cream and add Cloudberry Jam or Seedless Raspberry or what ever flavor you like. Chocolate is really great too!
Links for Krumkake irons(you really want a non-stick one!): http://www.bedbathandbeyond.com/product.asp?sku=17849727&utm_source=google&utm_medium=organic&utm_campaign=shopping
http://www.sears.com/shc/s/p_10153_12605_SPM5749862403P?sid=IDx20101019x00001a&ci_src=14110944&ci_sku=SPM5749862403
http://www.lefsestore.com/electrickrumkake.html
You do need a special decorative two-sided Krumkake iron ,similar to a waffle iron, to make these delicious cookies. It is well worth the investment...I've had mine for years... I've gone through many heart waffle irons but my krumkake iron takes a lickin and still keeps on ticken!
Krumkake
5 eggs
1 cup sugar
1 cup melted and cooled margarine ( yes that's what I said trust me!)
1 cup flour
cardamon to taste
In a bowl or 4 cup measuring cup (that's what i use), beat the eggs.
Gradually add the sugar and mix well.
Gradually add the margarine and mix well.
Add the flour slowly then cardamon ( I don't measure mine I go by smell but maybe about 1/2 teaspoon)
Now cover the batter and put it in the fridge for about 1/2 hour.
Plug in and heat up your iron, be careful it doesn't get too hot or your first two krumkake will be burnt...it's happened to me many times. Using a regular old teaspoon from your silverware drawer,spoon batter onto the center of the iron. Close iron, squeezing handles together to spread the batter. You don't want the batter to squeeze out, but if you put on the right amount it shouldn't happen. You don't want fat Krumkake!
Now if you listen to the directions from your Krumkake iron they tell you to watch the light when it either goes on or off your krumkake are done...I go buy the amount of steam coming out of the iron. When you first close and squeeze the handles together lost of steam come out when it slows down I open up the iron they are usually just right.
Moving quickly take the cookie from the Krumkake iron and roll quickly (while hot) around the Cone Form. I have two since it makes two at a time and invest in wooden cones the plastic ones are the pits!
Start your next two cookies, while they are cooking,(it doesn't take long) pull the first two cookies off the cones and place on paper towels to cool off.
Makes between 5 and 6 dozen krumkake.
When I serve my krumkake I whip up some heavy cream and add Cloudberry Jam or Seedless Raspberry or what ever flavor you like. Chocolate is really great too!
Links for Krumkake irons(you really want a non-stick one!): http://www.bedbathandbeyond.com/product.asp?sku=17849727&utm_source=google&utm_medium=organic&utm_campaign=shopping
http://www.sears.com/shc/s/p_10153_12605_SPM5749862403P?sid=IDx20101019x00001a&ci_src=14110944&ci_sku=SPM5749862403
http://www.lefsestore.com/electrickrumkake.html
Monday, November 7, 2011
Pebernødder - Danish Pepper Nuts
Last year a customer at the Bazaar was looking for Pebernødder. I asked her what it was as I had never heard of it. She explained to me it was a Danish cookie some what like ginger bread. So of course I decided to add it to this years list of things to bake. So then the quest for a recipe...I went through my cook books but ended up settling on a recipe from about.com. So Thursday night when I came home from work was Pebernødder baking night.
This recipe, as with many Scandinavian cookie recipes, calls for hartshorn which is a leavening ingredient. I did have some but it was old and unusable thank goodness there is a German Deli in town and they did have it. The last time I bought it was at Ikea which is quite a drive and I wasn't even sure if they carried it anymore. If you don't have heartshorn/hornsalt you can substitute a baking powder and baking soda mix. If you want to know more about it click on the link. http://www.godecookery.com/cookies/infoba.html
So they were a success. My son went crazy over them so today I am baking a batch just for him! This will definitely be an addition to my Christmas Cookie list.
Pebernødder - Danish Pepper Nuts
Prep Time: 20 minutes
Cook Time: 8 minutes
Total Time: 28 minutesIngredients:
•1 cup butter, room temperature
•1 cup packed brown sugar
•1 egg
•3 cups all-purpose flour
•2 tsp. hartshorn / baker's ammonia (or 1 tsp. baking powder plus 1/2 tsp. baking soda)
•1 tsp. freshly ground cardamom
•1/2 tsp. cinnamon
•1/2 tsp. ginger
•1/2 tsp. cloves
Preparation:
Preheat oven to 375º. Cream together the butter and brown sugar, stir in egg until well-blended. Sift together remaining ingredients, then mix into batter to form a stiff dough.
Pinch off handfuls,(small handfulls as they are easier to roll )of the dough and roll into 1/2"-thick snakes on a pastry mat or a lightly floured counter. If you are using a pastry mat you do not need to flour they roll out great. Using a sharp knife, cut each snake into 1/2"-long pieces (about the size of a hazelnut). Place pieces on an ungreased cookie sheet, separating them slightly, and bake for 8 minutes.
Yield: Lots (around 600 Danish Pepper Nuts).
The link to the orginal recipe: http://scandinavianfood.about.com/od/cookierecipes/r/peppernuts.htm
This recipe, as with many Scandinavian cookie recipes, calls for hartshorn which is a leavening ingredient. I did have some but it was old and unusable thank goodness there is a German Deli in town and they did have it. The last time I bought it was at Ikea which is quite a drive and I wasn't even sure if they carried it anymore. If you don't have heartshorn/hornsalt you can substitute a baking powder and baking soda mix. If you want to know more about it click on the link. http://www.godecookery.com/cookies/infoba.html
So they were a success. My son went crazy over them so today I am baking a batch just for him! This will definitely be an addition to my Christmas Cookie list.
Pebernødder - Danish Pepper Nuts
Prep Time: 20 minutes
Cook Time: 8 minutes
Total Time: 28 minutesIngredients:
•1 cup butter, room temperature
•1 cup packed brown sugar
•1 egg
•3 cups all-purpose flour
•2 tsp. hartshorn / baker's ammonia (or 1 tsp. baking powder plus 1/2 tsp. baking soda)
•1 tsp. freshly ground cardamom
•1/2 tsp. cinnamon
•1/2 tsp. ginger
•1/2 tsp. cloves
Preparation:
Preheat oven to 375º. Cream together the butter and brown sugar, stir in egg until well-blended. Sift together remaining ingredients, then mix into batter to form a stiff dough.
Pinch off handfuls,(small handfulls as they are easier to roll )of the dough and roll into 1/2"-thick snakes on a pastry mat or a lightly floured counter. If you are using a pastry mat you do not need to flour they roll out great. Using a sharp knife, cut each snake into 1/2"-long pieces (about the size of a hazelnut). Place pieces on an ungreased cookie sheet, separating them slightly, and bake for 8 minutes.
Yield: Lots (around 600 Danish Pepper Nuts).
The link to the orginal recipe: http://scandinavianfood.about.com/od/cookierecipes/r/peppernuts.htm
Sunday, August 1, 2010
Peach Cobbler with Spiced Honey Cream
Well I'm in Georgia so naturally I have to make a peach cobbler with some Georgia Peaches. On our way home from Brunswick on Thursday, where we had lunch at a really good Thai restaurant, I stopped at the Georgia Pig to pick up a pulled pork sandwich for dinner. My daughter Jillian had asked me to eat one for her so who could resist. Anyway in the parking lot was a gentleman selling Georgia and South Carolina peaches, so I picked up some for the cobbler. I even got a free peach sample and boy were they good! This is an old recipe my Mom and I have been using for many years. Enjoy!
Peach Cobbler with Spiced Honey Cream
Ingredients:
For the Filling:
5 lbs peaches- Enough to get 6 cups sliced fresh peaches
4 Tbs butter
3 Tbs sugar
3Tbs brown sugar
1/8 tsp salt
1 1/2 Tbs lemon juice
1 1/2 Tbs cornstarch
For the batter:
1/2 cup flour
1/2 cup sugar
1/2 tsp baking powder
2 Tbs butter room temp
1 egg slightly beaten
8x8 baking pan
Topping:
Spiced Honey Cream
1/2 pint heavy cream
2 Tbs honey
1/2 tsp cinnamon
Cobbler:
How to peel a peach
Peel and slice peaches. In a skillet heat butter. Add sugar,brown sugar,2/3 of the peaches and salt.Cover skillet and simmer peaches 5 minutes. Remove cover and continue cooking 15 more minutes reducing the juices in the pan.
While the peaches are cooking combine lemon juice and corn starch in a small cup. Mix well and set aside.
Also while the peaches are cooking prepare batter. In a small bowl add 1/2 cup sugar, 1/2 cup flour, 1/2 tsp baking powder and 2 Tbs soft butter. Mix with a fork. Add slightly beaten egg and mix well. Set aside
After the peaches have cooked 15 minutes add remaining peaches and cornstarch mixture. Cook 5 more minutes. Pour filling into pan. Drop batter on top by spoonfuls.
To make cream topping combine all ingredients in a small bowl and beat until firm. Keep in refrigerator till ready to put on cobbler.
Bake35-40 minutes at 400 degrees. remove from oven and let cool.
Serve warm or at room temp with Spiced Honey Cream.
.
Saturday, July 31, 2010
Key Lime Pie
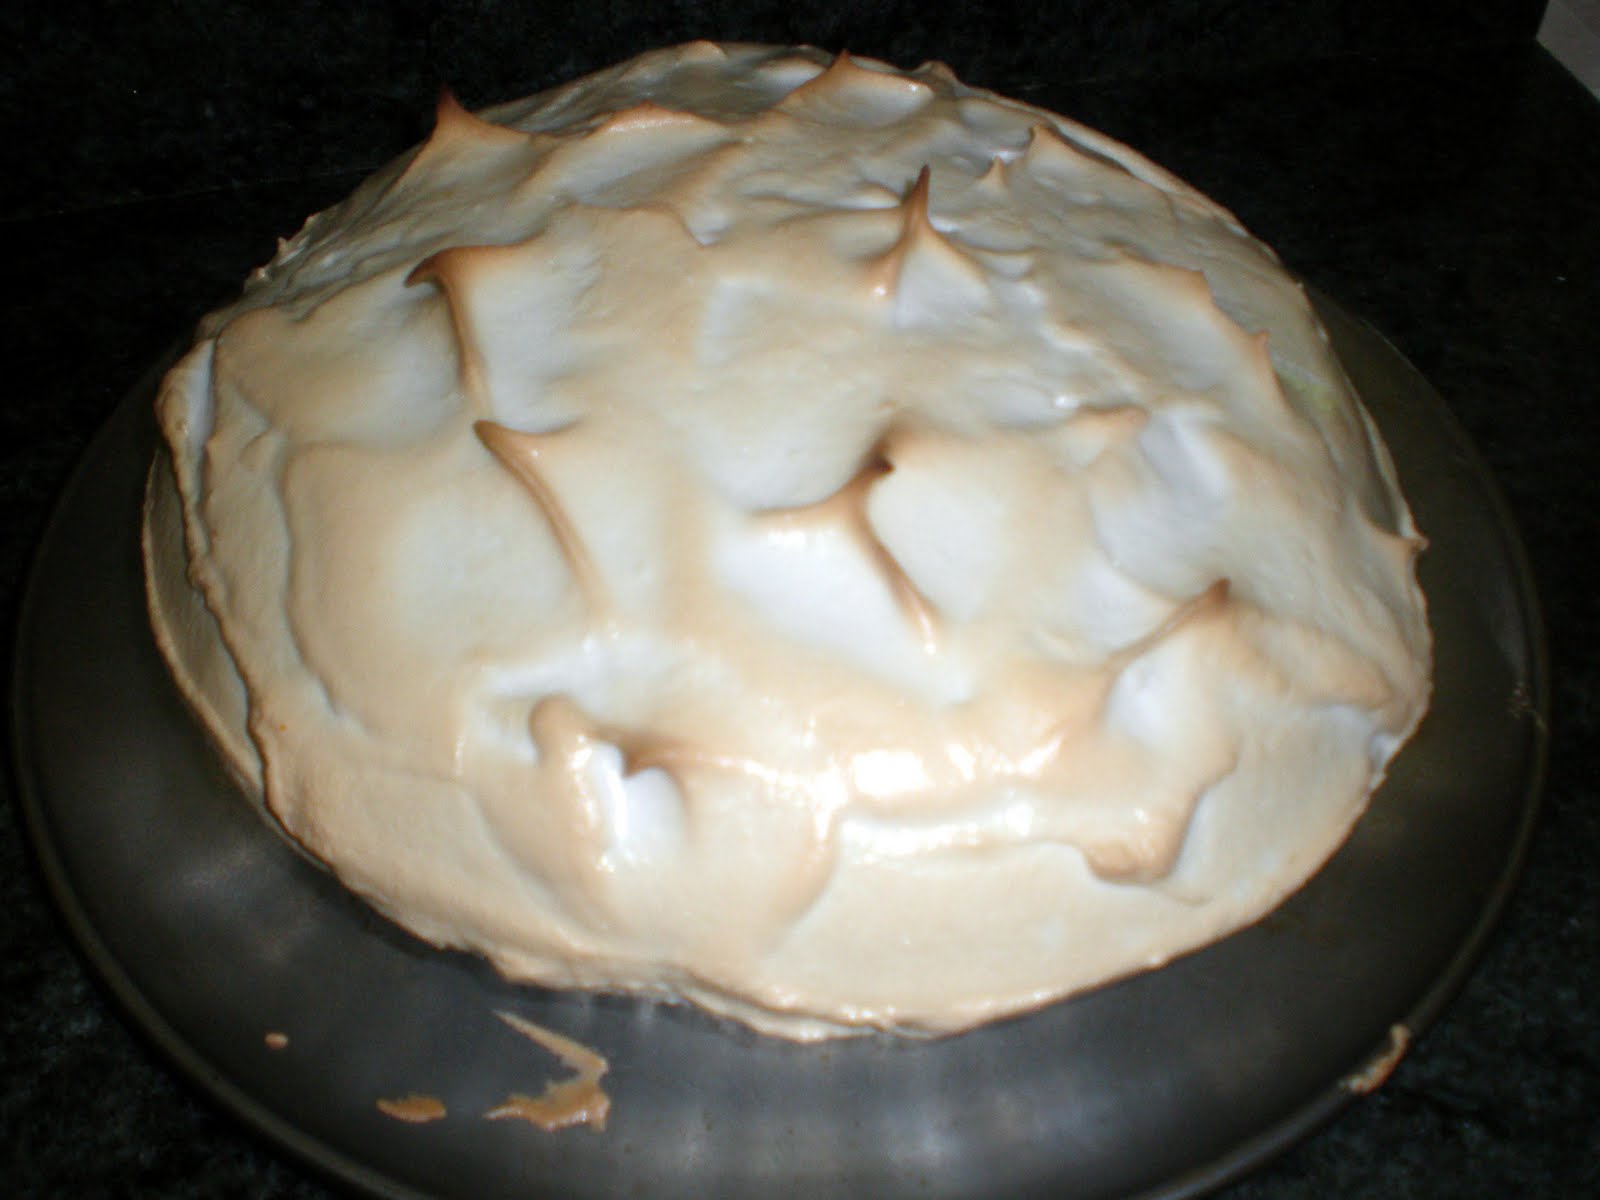
A great refreshing summer pie, Key Line is one of my favorites. I always make this for my Mom when I come down to see her. I top my Key Lime pie with meringue something they don't do in the South but that's how we like it in our family. I also don't make a crust for my Key Lime Pie I like to use the pre-made vanilla wafer crust it really makes the pie.
Key Lime Pie
Ingredients:
1 vanilla cookie crust (seal bottom of crust with one beaten egg white) Bake 5 minutes
Filing:
5 egg yolks (save 3 egg whites for meringue)
1 can sweetened condensed milk
2/3 cups fresh squeezed key lime juice ( If you can't find key limes use regular limes)
2 Tbs fresh lime zest
Topping:
Meringue - See recipe for Aunt Francis' Never Fail Meringue or whipped cream
In a medium sized bowl beat egg yolks till thick and creamy. Add sweetened condensed milk and mix till well blended. Mix in lime juice and zest. Pour into sealed vanilla cookie crust. Bake at 350 degrees for 15 minutes.
If you are topping with meringue :
Aunt Francis' Never fail Meringue
1 Tbs corn starch
1 Tbs water
1/2 cup boiling water
3 egg whites
1/2 cup super fine sugar
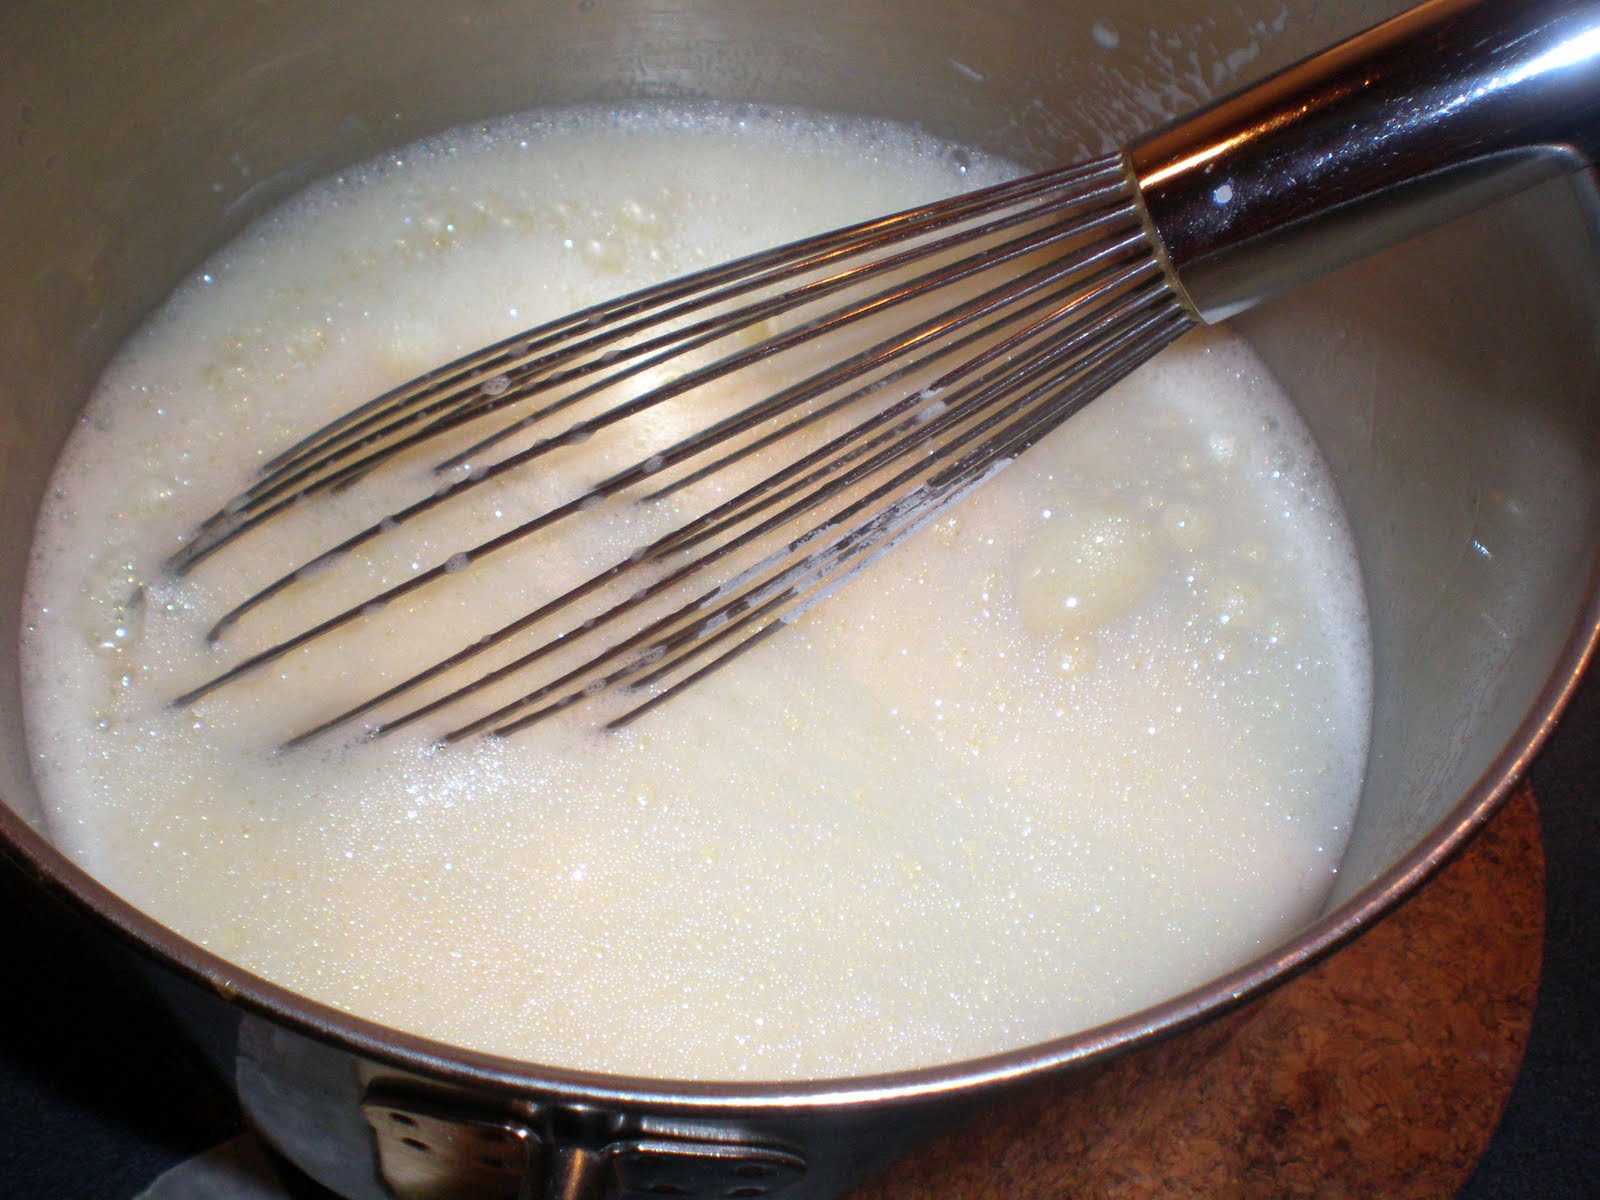
In a small cup combine 1 Tbs cornstarch and 1 Tbs cold water. Mix together. Boil 1/2 cup water in small sauce pan. Add the cornstarch mixture stirring constantly till mixture clears up. Remove from heat and cool off.
To make super fine sugar just process regular sugar in a min processer be careful not to over process.You can also purchase superfine sugar in the supermarket.
In a large bowl or stand mixer begin beating egg whites on low speed till frothy. Increase speed and begin slowing adding sugar and cornstarch mixture alternating each and whipping well between each addition. Beat till thick and shinny.
Spread meringue on hot lime filling making sure the meringue touches the edges of the pie shell. Bake at 400 degrees for about ten minutes.
Chill and serve!
Tips for Making Meringue
Key Lime Pie
Ingredients:
1 vanilla cookie crust (seal bottom of crust with one beaten egg white) Bake 5 minutes
Filing:
5 egg yolks (save 3 egg whites for meringue)
1 can sweetened condensed milk
2/3 cups fresh squeezed key lime juice ( If you can't find key limes use regular limes)
2 Tbs fresh lime zest
Topping:
Meringue - See recipe for Aunt Francis' Never Fail Meringue or whipped cream
In a medium sized bowl beat egg yolks till thick and creamy. Add sweetened condensed milk and mix till well blended. Mix in lime juice and zest. Pour into sealed vanilla cookie crust. Bake at 350 degrees for 15 minutes.
If you are topping with meringue :
Aunt Francis' Never fail Meringue
1 Tbs corn starch
1 Tbs water
1/2 cup boiling water
3 egg whites
1/2 cup super fine sugar
In a small cup combine 1 Tbs cornstarch and 1 Tbs cold water. Mix together. Boil 1/2 cup water in small sauce pan. Add the cornstarch mixture stirring constantly till mixture clears up. Remove from heat and cool off.
To make super fine sugar just process regular sugar in a min processer be careful not to over process.You can also purchase superfine sugar in the supermarket.
In a large bowl or stand mixer begin beating egg whites on low speed till frothy. Increase speed and begin slowing adding sugar and cornstarch mixture alternating each and whipping well between each addition. Beat till thick and shinny.
Spread meringue on hot lime filling making sure the meringue touches the edges of the pie shell. Bake at 400 degrees for about ten minutes.
Chill and serve!
Tips for Making Meringue
Chocolate Truffle Brownies
The first thing we baked when I got to my Mom's in Georgia was Truffle Brownies. She had found the recipe in one of her bon appetite magazines and had saved it for when I came down. Looking at the recipe I was thinking how can you possibly get 25 brownies from that size pan. Well after making them I understood how and why...these brownies are so rich they need to be cut into little tiny squares! So if your in the mood for a chocolate fix or know a chocoholic give these brownies a try..you will not be disappointed!
Chocolate Truffle Brownies
Monday, July 12, 2010
Blueberry Maple-Mascarpone Tart
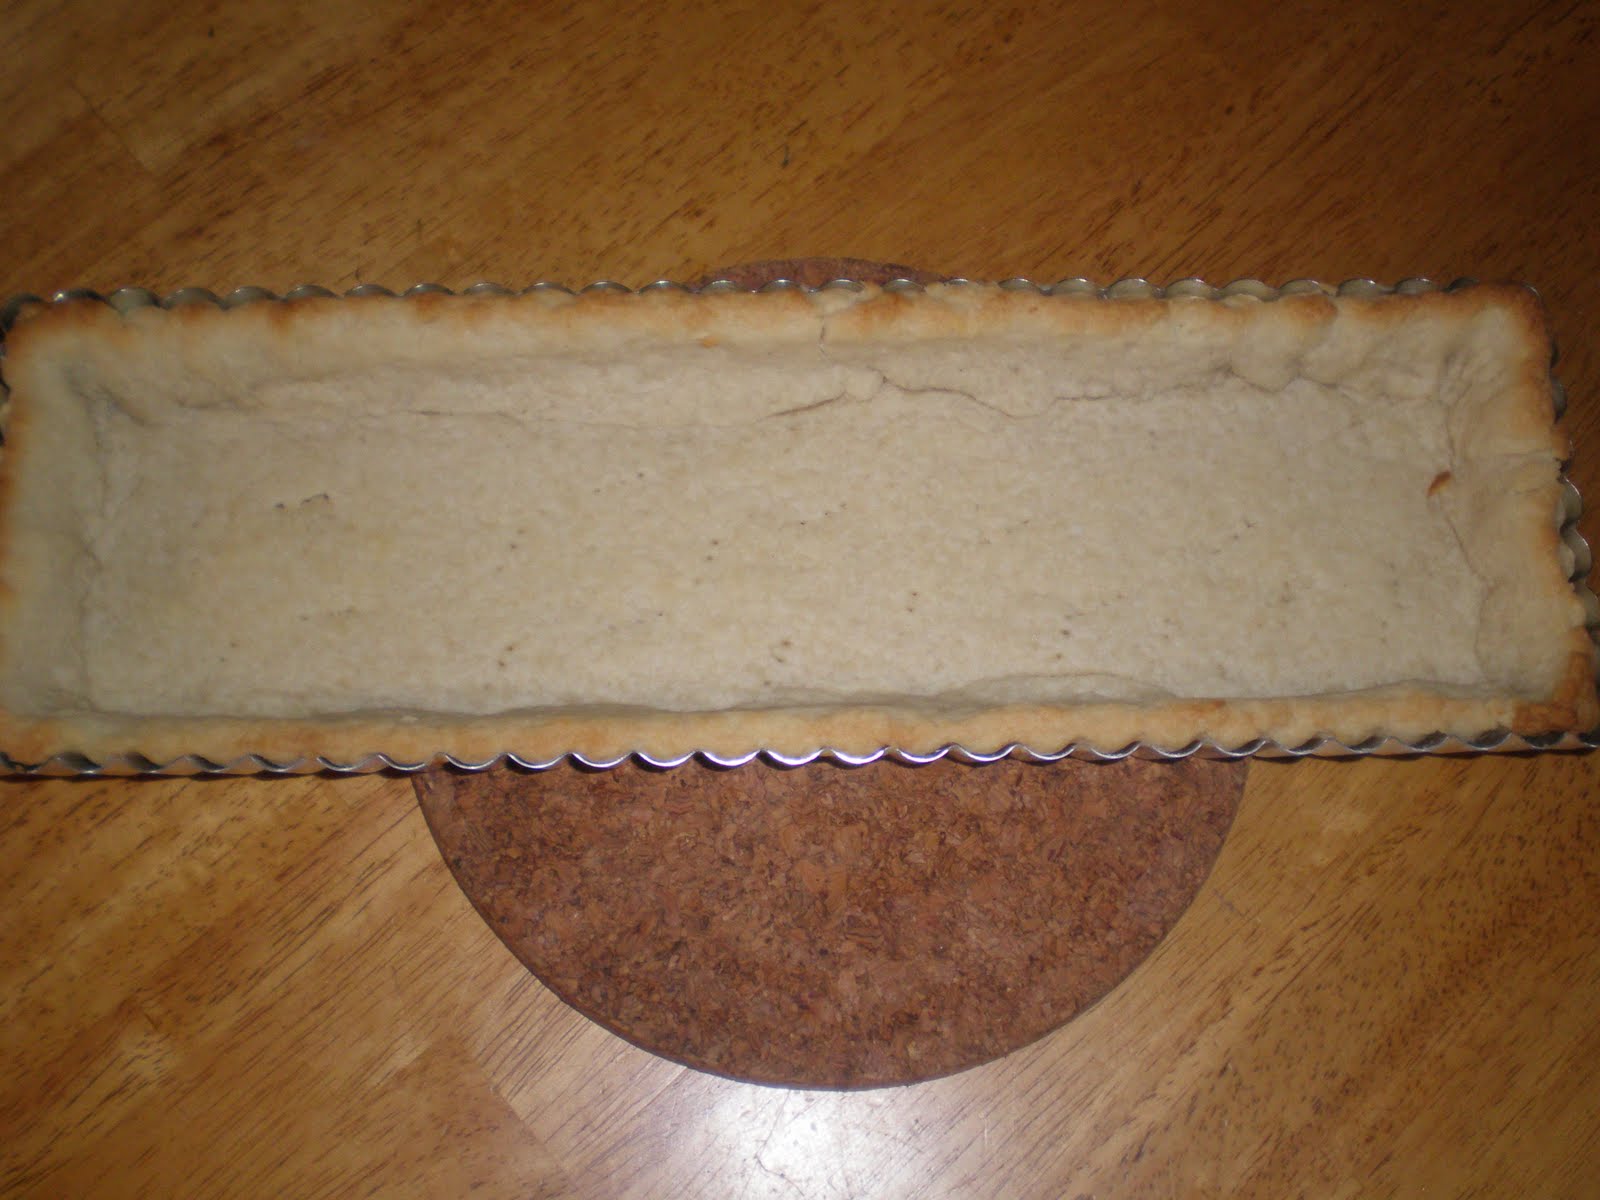
This recpie I had photocopied out of a Country Living Magazine while I was at a Doctors office in 2001. It was actually a whole section dedicated to all kinds of blueberry recipies. The recptionist was kind enough to photocopy the whole section for me. Anyway the recpie callls for a 4x10 tart pan. Well let me tell you I could not find a 4x10 tart pan so I ended up with a 4x13. I was worried that the crust would be short or to thin but it was enough to cover the pan and then some. I did have to increase the amount of mascarpone cheese and maple syrup though. I also added raspberries because I wanted it to be red, white and blue for the Fouth of July. This tart everyone seemed to love there was only a small piece left over but I don't know if I liked the nutmeg flavoring in the crust. If I make it again I would try maybe caradomn instead.
Ingredients:
Pastery:
1 1/4 cup(s) all-purpose flour
2 tablespoon(s) sugar
1/2 teaspoon(s) fresh ground nutmeg
1/2 teaspoon(s) salt
1/2 cup(s) unsalted butter, chilled and cut into small pieces
3 tablespoon(s) (up to 5, as needed) cold water
Filling:
12 ounce(s) mascarpone cheese
3 tablespoon(s) maple syrup
2 cup(s) fresh blueberries, washed and drained
Make the pastry: In a food processor, combine flour, sugar, nutmeg, and salt. Add butter pluse the blender to incorporate it into the flour until mixture resembles a coarse meal. Mix in water just until the mixture begins to cling together. Gather into a ball and flatten into a 3- by 5-inch rectangle. Wrap tightly in plastic wrap and refrigerate for 30 minutes.
Blind-bake the crust: Preheat oven to 425 degrees F. On a floured surface, roll dough out into a 1/4-inch-thick rectangle at least 7 by 13 inches and transfer it to a 4- by 13-inch tart pan with a removable bottom, leaving about 1/2 inch of dough along the edges. Gently press the dough into sides of tart pan and crimp the edges, if desired. Cut out a rectangle of parchment paper to cover the bottom of the dough and line it with pie weights or dried beans. Bake for 10 minutes, remove the weights and paper, and continue to bake until the crust is golden -- about 10 more minutes. Cool on a wire rack. Remove crust from pan and set aside.
Make the filling: In a small bowl, stir together mascarpone cheese and maple syrup until just combined. Use a small spatula to spread the filling into the bottom of the cooled tart shell. Top with blueberries and refrigerate until ready to serve.
Ingredients:
Pastery:
1 1/4 cup(s) all-purpose flour
2 tablespoon(s) sugar
1/2 teaspoon(s) fresh ground nutmeg
1/2 teaspoon(s) salt
1/2 cup(s) unsalted butter, chilled and cut into small pieces
3 tablespoon(s) (up to 5, as needed) cold water
Filling:
12 ounce(s) mascarpone cheese
3 tablespoon(s) maple syrup
2 cup(s) fresh blueberries, washed and drained
Make the pastry: In a food processor, combine flour, sugar, nutmeg, and salt. Add butter pluse the blender to incorporate it into the flour until mixture resembles a coarse meal. Mix in water just until the mixture begins to cling together. Gather into a ball and flatten into a 3- by 5-inch rectangle. Wrap tightly in plastic wrap and refrigerate for 30 minutes.
Blind-bake the crust: Preheat oven to 425 degrees F. On a floured surface, roll dough out into a 1/4-inch-thick rectangle at least 7 by 13 inches and transfer it to a 4- by 13-inch tart pan with a removable bottom, leaving about 1/2 inch of dough along the edges. Gently press the dough into sides of tart pan and crimp the edges, if desired. Cut out a rectangle of parchment paper to cover the bottom of the dough and line it with pie weights or dried beans. Bake for 10 minutes, remove the weights and paper, and continue to bake until the crust is golden -- about 10 more minutes. Cool on a wire rack. Remove crust from pan and set aside.
Make the filling: In a small bowl, stir together mascarpone cheese and maple syrup until just combined. Use a small spatula to spread the filling into the bottom of the cooled tart shell. Top with blueberries and refrigerate until ready to serve.
Mixed Berry Tart with Pastery Cream
This recipe came from the Spring Entertaining 2010 edition of Cook's Illustrated. I had never really made a fruit tart with pastry cream so I really wanted to try this recipe. Let me tell you of all the desserts I made for the 4th, this was my personal favorite. The cream was easy to make and tasted out of this world. I baked the crust and made the cream the night before. The tart was assembled about 1 hour before the party.
Ingredients:
For the Pastry Cream :
2 cups half-and-half
1/2 cup granulated sugar
pinch table salt
5 large egg yolks , chalazae removed (see note) *
3 tablespoons cornstarch
4 tablespoons unsalted butter (cold), cut into 4 pieces
1 1/2 teaspoons vanilla extract
For the Tart Pastry :
1 large egg yolk
1 tablespoon heavy cream
1/2 teaspoon vanilla extract
1 1/4 cups unbleached all-purpose flour (6 1/4 ounces)
2/3 cup confectioners' sugar (about 3 ounces)
1/4 teaspoon table salt
8 tablespoons unsalted butter (1 stick), very cold, cut into 1/2-inch cubes
Fruit and Glaze :
6 oz raspberries
6 oz blackberries
blueberries
1/2 cup red currant jelly or apple jelly or one package of Oetker Clear Glaze
For the Pastry Cream: Heat half-and-half, 6 tablespoons sugar, and salt in medium heavy-bottomed saucepan over medium heat until simmering, stirring occasionally to dissolve sugar.
Meanwhile, whisk egg yolks in medium bowl until thoroughly combined. Whisk in remaining 2 tablespoons sugar and whisk until sugar has begun to dissolve and mixture is creamy, about 15 seconds. Whisk in cornstarch until combined and mixture is pale yellow and thick, about 30 seconds.
When half-and-half mixture reaches full simmer, gradually whisk simmering half-and-half into yolk mixture to temper. Return mixture to saucepan, scraping bowl with rubber spatula; return to simmer over medium heat, whisking constantly, until 3 or 4 bubbles burst on surface and mixture is thickened and glossy, about 30 seconds. Off heat, whisk in butter and vanilla. Transfer mixture to medium bowl, press plastic wrap directly on surface, and refrigerate until cold and set, at least 3 hours or up to 48 hours.
For the Tart Pastry: While pastry cream is chilling, whisk together yolk, cream, and vanilla in small bowl; set aside. Pulse to combine flour, sugar, and salt in bowl of food processor fitted with steel blade. Scatter butter pieces over flour mixture; pulse to cut butter into flour until mixture resembles coarse meal, about fifteen 1-second pulses. With machine running, add egg mixture and process until dough just comes together, about 25 seconds. Turn dough onto sheet of plastic wrap and press into 6-inch disk. Wrap in plastic and refrigerate at least 1 hour or up to 48 hours.
Remove dough from refrigerator (if refrigerated longer than 1 hour, let stand at room temperature until malleable). Unwrap and roll out between lightly floured large sheets of parchment paper or plastic wrap to 13-inch round. (If dough is soft and sticky, slip onto baking sheet and refrigerate until workable, 20 to 30 minutes.) Transfer dough to tart pan by rolling dough loosely around rolling pin and unrolling over 9- to 9 1/2-inch tart pan with removable bottom. Working around circumference of pan, ease dough into pan corners by gently lifting dough with one hand while pressing dough into corners with other hand. Press dough into fluted sides of pan. (If some edges are too thin, reinforce sides by folding excess dough back on itself.) Run rolling pin over top of tart pan to remove excess dough. Set dough-lined tart pan on large plate and freeze 30 minutes (can be sealed in gallon-sized zipper-lock plastic bag and frozen up to 1 month).
Meanwhile, adjust oven rack to middle position and heat oven to 375 degrees. Set dough-lined tart pan on baking sheet, press 12-inch square of foil inside frozen tart shell and over edges and fill with metal or ceramic pie weights. Bake until golden brown, about 30 minutes, rotating halfway through baking time. Remove from oven and carefully remove foil and weights by gathering edges of foil and pulling up and out. Continue to bake until deep golden brown, 5 to 8 minutes longer. Set baking sheet with tart shell on wire rack to cool to room temperature, about 30 minutes.
To Assemble and Glaze the Tart: When tart shell is completely cool, spread cold pastry cream over bottom, using offset spatula or large spoon. (Can press plastic wrap directly on surface of pastry cream and refrigerate up to 30 minutes.) Arrange fruit on top of pastry cream.
Bring jelly to boil in small saucepan over medium-high heat, stirring occasionally to smooth out lumps. When boiling and completely melted, apply by dabbing and flicking onto fruit with pastry brush; add 1 teaspoon water and return jelly to boil if it becomes too thick to drizzle. (Tart can be refrigerated, uncovered, up to 30 minutes.) Or you can use a package of Oetker Fruit Glaze. Just folloe the directions on the back of the package then brush on fruit. You will end up with moer clear glaze then you need. Next time 'm going to try using 1/2 of the package.
Remove outer metal ring of tart pan, slide thin metal spatula between bottom of crust and tart pan bottom to release, then slip tart onto cardboard round or serving platter; serve.
*Chalazae are cordlike strands of egg white protein that are attached to the yolks—removing them with your fingers is easy and eliminates the need to strain the pastry cream after cooking.
The pastry cream can be made a day or two in advance, but do not fill the prebaked tart shell until just before serving. Once filled, the tart should be topped with fruit, glazed, and served within a few hours.
Ingredients:
For the Pastry Cream :
2 cups half-and-half
1/2 cup granulated sugar
pinch table salt
5 large egg yolks , chalazae removed (see note) *
3 tablespoons cornstarch
4 tablespoons unsalted butter (cold), cut into 4 pieces
1 1/2 teaspoons vanilla extract
For the Tart Pastry :
1 large egg yolk
1 tablespoon heavy cream
1/2 teaspoon vanilla extract
1 1/4 cups unbleached all-purpose flour (6 1/4 ounces)
2/3 cup confectioners' sugar (about 3 ounces)
1/4 teaspoon table salt
8 tablespoons unsalted butter (1 stick), very cold, cut into 1/2-inch cubes
Fruit and Glaze :
6 oz raspberries
6 oz blackberries
blueberries
1/2 cup red currant jelly or apple jelly or one package of Oetker Clear Glaze
For the Pastry Cream: Heat half-and-half, 6 tablespoons sugar, and salt in medium heavy-bottomed saucepan over medium heat until simmering, stirring occasionally to dissolve sugar.
Meanwhile, whisk egg yolks in medium bowl until thoroughly combined. Whisk in remaining 2 tablespoons sugar and whisk until sugar has begun to dissolve and mixture is creamy, about 15 seconds. Whisk in cornstarch until combined and mixture is pale yellow and thick, about 30 seconds.
When half-and-half mixture reaches full simmer, gradually whisk simmering half-and-half into yolk mixture to temper. Return mixture to saucepan, scraping bowl with rubber spatula; return to simmer over medium heat, whisking constantly, until 3 or 4 bubbles burst on surface and mixture is thickened and glossy, about 30 seconds. Off heat, whisk in butter and vanilla. Transfer mixture to medium bowl, press plastic wrap directly on surface, and refrigerate until cold and set, at least 3 hours or up to 48 hours.
For the Tart Pastry: While pastry cream is chilling, whisk together yolk, cream, and vanilla in small bowl; set aside. Pulse to combine flour, sugar, and salt in bowl of food processor fitted with steel blade. Scatter butter pieces over flour mixture; pulse to cut butter into flour until mixture resembles coarse meal, about fifteen 1-second pulses. With machine running, add egg mixture and process until dough just comes together, about 25 seconds. Turn dough onto sheet of plastic wrap and press into 6-inch disk. Wrap in plastic and refrigerate at least 1 hour or up to 48 hours.
Remove dough from refrigerator (if refrigerated longer than 1 hour, let stand at room temperature until malleable). Unwrap and roll out between lightly floured large sheets of parchment paper or plastic wrap to 13-inch round. (If dough is soft and sticky, slip onto baking sheet and refrigerate until workable, 20 to 30 minutes.) Transfer dough to tart pan by rolling dough loosely around rolling pin and unrolling over 9- to 9 1/2-inch tart pan with removable bottom. Working around circumference of pan, ease dough into pan corners by gently lifting dough with one hand while pressing dough into corners with other hand. Press dough into fluted sides of pan. (If some edges are too thin, reinforce sides by folding excess dough back on itself.) Run rolling pin over top of tart pan to remove excess dough. Set dough-lined tart pan on large plate and freeze 30 minutes (can be sealed in gallon-sized zipper-lock plastic bag and frozen up to 1 month).
Meanwhile, adjust oven rack to middle position and heat oven to 375 degrees. Set dough-lined tart pan on baking sheet, press 12-inch square of foil inside frozen tart shell and over edges and fill with metal or ceramic pie weights. Bake until golden brown, about 30 minutes, rotating halfway through baking time. Remove from oven and carefully remove foil and weights by gathering edges of foil and pulling up and out. Continue to bake until deep golden brown, 5 to 8 minutes longer. Set baking sheet with tart shell on wire rack to cool to room temperature, about 30 minutes.
To Assemble and Glaze the Tart: When tart shell is completely cool, spread cold pastry cream over bottom, using offset spatula or large spoon. (Can press plastic wrap directly on surface of pastry cream and refrigerate up to 30 minutes.) Arrange fruit on top of pastry cream.
Bring jelly to boil in small saucepan over medium-high heat, stirring occasionally to smooth out lumps. When boiling and completely melted, apply by dabbing and flicking onto fruit with pastry brush; add 1 teaspoon water and return jelly to boil if it becomes too thick to drizzle. (Tart can be refrigerated, uncovered, up to 30 minutes.) Or you can use a package of Oetker Fruit Glaze. Just folloe the directions on the back of the package then brush on fruit. You will end up with moer clear glaze then you need. Next time 'm going to try using 1/2 of the package.
Remove outer metal ring of tart pan, slide thin metal spatula between bottom of crust and tart pan bottom to release, then slip tart onto cardboard round or serving platter; serve.
*Chalazae are cordlike strands of egg white protein that are attached to the yolks—removing them with your fingers is easy and eliminates the need to strain the pastry cream after cooking.
The pastry cream can be made a day or two in advance, but do not fill the prebaked tart shell until just before serving. Once filled, the tart should be topped with fruit, glazed, and served within a few hours.
Subscribe to:
Posts (Atom)