Showing posts with label baking. Show all posts

Tuesday, January 10, 2012

Scandinavian Almond Bread

Scandinavian Almond Bread (bread machine)

image

Ingredients for Bread:
1 cup Milk
1 Egg
3 tablespoons Butter Softened
8 ounces Almond paste -- 1/8" slices
2½ cup Flour -- not bread flour
2 tablespoons brown Sugar
½ teaspoon Salt
2 teaspoons Yeast


Ingredients for Glaze:
1 teaspoon light corn syrup
1 teaspoon warm water

Almonds -- slivered


Unless the instructions that came with your ABM call for putting the yeast in the pan first and incorporating the liquid ingredients last, pour the milk into the baking pan of your ABM and break in the egg.


If the butter is not soft, cut it into small chunks to ensure its blending into the dough, then add it to the liquids. Next add the almond paste, sliced so it will blend better too. Measure in the flour, brown sugar, and salt, and add the yeast as directed for your bread maker. You can use your machine's full cycle with this bread. If a light color setting is available, use it as well.


As soon as the bread has finished baking, remove it from the machine, closing the cover again, and ease the loaf from the pan. Combine the corn syrup and warm water and brush the top of the loaf with this mixture, using a pastry brush. Sprinkle the slivered almonds over the glaze, put the bread gently back in its pan, and return it to the electronic oven for a few minutes to dry the glaze a bit. Source: The Bread Machine Bakery Book

Pin It

Sunday, December 18, 2011

Kransekake Sticks another Bakers Odyssey!

I belong to a few Norwegian groups on Facebook. They are groups where people share their heritage and their recipes. This was posted on a site and I knew I had to try them. I love Kransekake and add the dipping of chocolate and I was sold. So I set out to make them. What I thought would be a relatively simple task....Baking is my thing... has turned into a journey of sorts. 

The recipe is so simple just 3 ingredients what could go wrong?  Here is the Recipe from M.F. Scott as posted...

****Beware read this whole article before trying these cookies...learn from my mistakes!!!!


Kransekake sticks


1 lb finely ground almonds

1 lb powdered sugar

3 egg whites

Mix the ingredients into a dough and place in the fridge overnight.

Roll the dough so that it's the size of a finger and cut into 3 inch long sticks

Bake for ten minutes at 350 degrees.

Once they've cooled down dip half of the stick into melted dark chocolate.

* Sometimes, after dipping in the chocolate, I'll have extra ground almonds that I'll dip the chocolate end into, just makes them a little more festive.

So I whipped out my handy food processor and ground those almonds up to what I thought was finely ground. And stuck it in the fridge over night.
 

The next day I'm all excited to get started with rolling these puppies out...I was dreaming of Kransekake all night. So I roll them out about the size of a finger...my index finger seemed like a good choice cut them to  3 inches... put them on a cookie sheet and poped them into the oven.


Now I've seen and eaten Kransekake sticks before so I know what they look like so when I opened the oven to take the cookies out I almost died... sorry I don't have a pic of this I was too much in shock.. My cookies had expanded soo much they were stuck together and all strangely shaped... ugh! I guess I picked the wrong finger. So the next batch I decided to roll out much thinner... the size of my pinkie finger and keep the cookies much further apart.
 

I put them in the oven again. This time they look a bit better but I know they still don't look like the Kransekake sticks I've seen.


But they tasted delicious (my husband and son ate the first sheet  no chocolate needed)...so I finished up the dough and figured once I dip them in chocolate I could hide some of the funny shapes and like I said they tasted delicious!

Now another person on the site also tries the recipe and posts a picture of her cookie asking if that is how they are supposed to look. And what do my eyes see... squiggly cookies that look like mine. So i say to myself OK Christine something is not quite right. Mind you it's 11:00 PM and I decide to search the internet to see what the heck is going on, is it the recipe..but they taste great...so I search the net to see what I can find.

This video sent me on my next quest:
A Baker's Odyssey "Kransekake" Recipe


OK so now I know what I did wrong what I thought was finely ground almonds were not fine enough. I don't own one of those nut grinders but I was sure in my arsenal of kitchen gadgets I must have something that will grind up those almonds fine enough! So out comes the Kitchen Aid and the special food grinder attachment..


In go the almonds and out comes...not what I'm looking for...and the grinder jammed up..oops! Ok what do I try next out comes the Kitchen Aid coffee grinder thin I bought for grinding up spices...


Another no go the results were worse than the food grinder and mind you its now 1:00 AM... my family is trying to figure out what the heck is she doing down there at 1 in the morning. So I go an view the video again...hum I think to myself I have a Pampered Chef cheese grinder that  sort of looks like part of that nut grinder thing so into the closet I go and pull that baby out!


What did I have to lose at this time of night and it was the last thing in my grinding arsenal! So in went the almonds and low and behold out came.... finely ground almonds... woo whoo!....maybe not as fine as the video but closer than anything I was able to achieve with anything else!

Now I'm thinking to myself I don't think Pampered Chef had almonds in mind for this greater..I hope it holds up..and am I going to do a pound of almonds this way? Well the answer was no way so I decided to halve the recipe. Buy the time I was done with the dough it was 2:00 AM but I was happy!


Kransekake Sticks

1/2 lb finely ground almonds (almost like a powder see pic above)

1/2 lb powdered sugar

1.5 ounces egg whites ( the whites from 1 1/2 eggs)

Optional about 9 oz. of good quality chocolate to dip the ends in.
*****************************************************

Finely grind the almonds so they are almost...I did say almost.... like a powder.
Add the ground almonds to the powdered sugar and mix buy hand till combined. Then put in the bowl of your food processor ...turn on and add the egg whites... process till combined. Put in a covered container and refrigerate over night.

Taking small portions of dough...Roll so that it's about the thickness of a pencil and cut into 3 inch long sticks. Place on parchment lines baking sheets..do not put them too close together!!!!


Bake for 6-7 minutes at 350 degrees. Start rolling out your next sheet while your first pan is baking.

Remove from baking pan to cooling rack.


As you can see they are still a bit squiggly but look sooo much nicer when you get the nuts ground to the right consistency!

Once they've cooled down  you candip half of the stick into melted dark chocolate. I am fussy about my Chocolate being an Official Chocoholic so I used Lindt for these I like the taste and consistency of the chocolate when it is melted.


Chop up the chocolate and melt in the microwave. I do  1/2 the chocolate at a time. Zap it for 30 seconds them mix and another 30 seconds mix and you should be good to go!


Once the chocolate has hardened store in an airtight container till ready to eat. This recipe even though it was 1/2 of the original made 50 cookies!

Also... if you are going to freeze them do not dip in chocolate...I did this and they get a blush on the chocolate..live and learn!

 A side note from the owner of the original recipe:
* Sometimes, after dipping in the chocolate, I'll have extra ground almonds that I''ll dip the chocolate end into, just makes them a little more festive.

Good Luck on your Kransekake Odyssey!!!!!!!


Pin It

Sunday, December 4, 2011

Jam Filled Cream Cheese Cookies

When I was a kid my mom always made a cookie she called Cookie Bows. They were a cream cheese  cookie filled with jam. I had never made them. Then in 2009 a friend gave me a subscription to Everyday Food and on the cover was an intriguing cookie on the cover...I just had to make and low and behold they ended up being cream cheese cookies. My Mom made them in a bow shape but I love how they look when made with a star shaped cookie cutter!

Jam filled Cream Cheese Cookies

Ingredients:

8 ounces bar cream cheese softened
1 stick unsalted butter room temperature
1/3 cup sugar
2 cups all-purpose flour

1/2 teaspoon coarse salt
2 egg yolks
Jam- your choice of flavors


Directions:

In a large bowl beat cream cheese, butter, and sugar until light and fluffy. With mixer on low, add flour and salt; beat until just combined.

Divide dough into 3 portions; flatten each into a disk. Wrap in plastic wrap and refrigerate at least 20 minutes an hour is better!

                                     
Preheat oven to 375 degrees. Mix egg yolks with 1 teaspoon water.


Working with 1 dough sheet at a time, roll dough out on a very lightly floured surface to 1/8 inch thick.


Using a 3 inch star-shaped cookie cutter, cut out cookies.


Spoon 1/4 teaspoon jam into center of each.....


and brush exposed inside dough with egg wash.


Shape cookies by bringing the points of the star together in the center of the cookie twist and gently push down.

Place on parchment lined cookies sheets, 2 inches apart,and refrigerate 20 minutes (re-roll scraps).


Repeat  above with with each disk. I use a different flavor jam for each disk. This year I used Seedless Raspberry Jam, Apricot Jam , Seedless Blackberry Jam  and  Cognac Vanilla Peach Jam!
After 20 minutes take cookies out of fridge brush outside with egg wash and sprinkle with finishing sugar course sugar.


Bake until cookies are light golden brown, about 15 minutes, rotating sheets halfway through. Let cool completely on wire racks.

If you work at an even pace, buy the time you fill up a cookie sheet with cookies and refrigerate for the 20 minutes begin working on the next batch. When the next sheet is done it should be 20 minutes pop one cookie sheet into the oven and the next into the fridge.

These cookies are worth the time.... they look beautiful and taste great. And don't worry a few might pop open on the top... those are the ones you get to eat right away!!!!

Friday, December 2, 2011

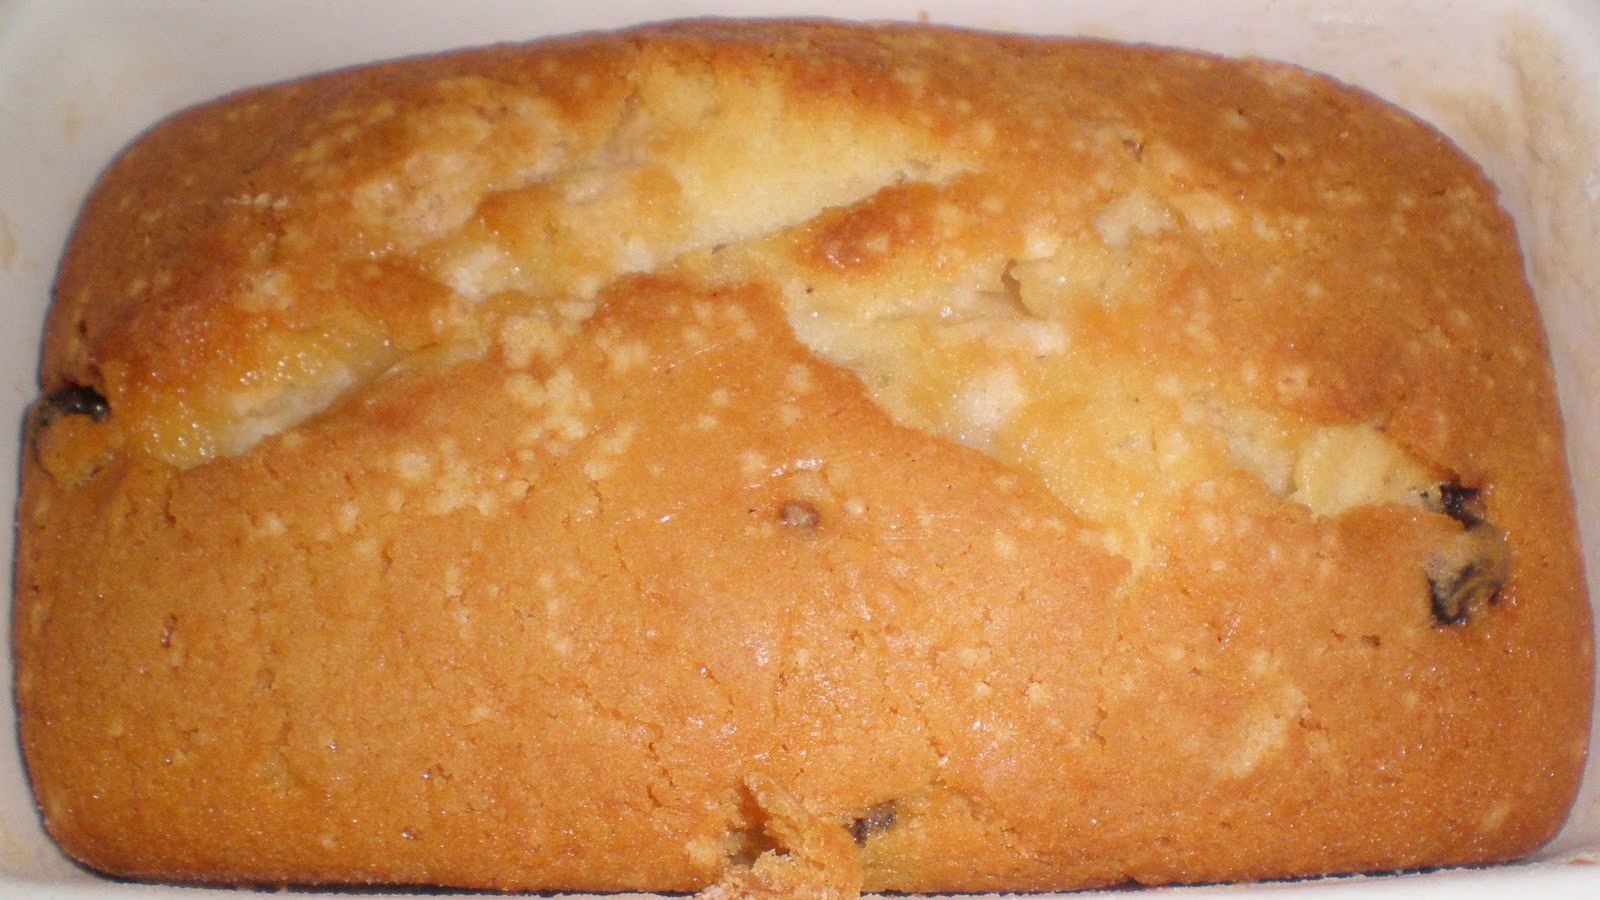
Sosterkake

Well I'm busy writing this post late at night because I made a big oops! While at the Son's of Norway meeting tonight a member asked for my Sosterkake recipe. No problem I tell her(that's you Janet O) I'll mail you the link to my blog the recipe is on there. Well low and behold I never posted it so Janet O. this is for you!


Sosterkake

Ingredients:


1 cup butter (room temp/softened)
2 eggs

3 cups flour

2 cups sugar

12 ounces evaporated milk

2 teaspoons baking powder

1 1/2 teaspoons cardamon

1 - 1 1/2 cups dried fruit
( traditionally raisins but I make up my own variations such as cranberries and apricots,wild blueberries, currents or golden raisins the choice is yours)

also optional is 1 teaspoon almond extract

Directions:

Pre-heat oven to 350 degrees.

Grease and flour 2 bread pans.

Cream together butter eggs and sugar till well mixed.

Add flour and baking powder mix till well blended.

Slowly add the evaporated milk.

When all combined add you choice of dried fruits...if you are using large fruits like apricots cut them up into small pieces.

Bake for 1 hour.

Cool and enjoy!!!


Tuesday, November 29, 2011

Cocoa Snowflakes

This recipe should be on everyone's list of Christmas cookies or any time cookies. They are so good like eating mini brownies! My husband found this recipe in a Penzey's Spice catalogue years ago. Once I started making these I gave up my regular snowball cookie recipe! The recipe calls for nuts but I never use them.
Let me just warn you the dough must chill at least three hours! Even then if the dough starts to get soft put it back in the fridge for about 10 minutes.


Cocoa Snowflakes


5 tablespoons butter


6 Tablespoons Coco powder


1 cup sugar


1 eggs


1 cup flour

1 Teaspoon vanilla


2 extra large


1/4 teaspoon salt


1 teaspoon baking powder


1 cup finely chopped nuts-optional


In a small sauce pan melt the butter. Blend in the coco powder till smooth, remove from heat. Add the sugar and mix till smooth then transfer to a medium bowl.

Add vanilla and eggs one at a time mixing well.

Sift together into the mixture above the flour salt and baking powder till well combined. Add nuts if desired.

Cover and refrigerate till well chilled at least 2 hours or more.

When dough is ready roll into 3/4 inch balls. Roll balls in powdered sugar. Put on cookie sheet 2 inches apart. Bake 5-8 minutes.

Makes about 45 cookies. Store in airtight container or freeze.

Monday, November 28, 2011

Kringla Swedish Wreaths

I found this recipe a few years ago, of all places, on food network. I wanted to try more Scandinavian cookies for Christmas.They sounded interesting and something different so I decided to give them a try. They have been on my list of Christmas cookies since.


Kringla Swedish Wreaths

2 sticks of butter Softened

1/2 cup sugar

2 egg yolks

2 1/2 cups flour

Egg wash (whisked egg whites)


Cream the butter, sugar and egg yolks in a medium bowl. Blend in the flour. Gather the dough into a ball , wrap in plastic wrap and chill.

After dough has chilled ,Preheat the oven to 350 degrees. Line cookie sheets with parchment paper. You'll be glad you did!

Using a small cookie scoop, scoop out a round ball, not too big. Roll out between about 5-6 inches long and 1/3-inch thick. At this point they can be either formed into a circle and twist or knot the ends. Continue until all the dough has been used.

Carefully brush each cookie with the egg white wash, don't be too sloppy with the wash you don't want your cookies to stick. Sprinkle with parl sukkar (pearl sugar) and bake for 10 to 12 minutes, until just set, not browned. I rotate the cookie pan 1/2 way through the cooking time for even baking. Remove carefully from cookie sheet right away to cooling rack.

Store in airtight container or freeze.

Sunday, November 27, 2011

Sandkaker A Traditional Norwegian Christmas Cookie

This is my first try at making Sandkaker,a traditionl Norwegian Christmas Cookie. They are like mini tarts and are filled with flavored whipped cream whan ready to be eaten. We always made Cloudberry Cream to fill ours with or you can eat them just as they are!


This recipe is from my mother-in-law...it was one of the cookies she usually made but since she is no longer with us I have to start baking them for my family. To make these cookies you need Sandkaker molds also known as mini-tartlet pans. I'm not sure where mine came from...but I'm sure you can find them somewhere on the net. My mother-in-law had bright shinny ones...mine are non-stick and work great! I had bought them years ago to make mini-tarts...glad I did!


There are six different shapes of tins in my set or sets...not sure if I have more than one set but I do have alot!


SANDKAKER


2 sticks of butter room temperature

1 cup sugar

2 1/2 cups flour

1 egg

1 teaspoon almond extract


Pre-heat oven to 350 degrees.

Cream together butter and sugar till light and fluffy. Add egg and almond extract and mix till combined. Add flour gradually ..mix well. Refridgerate dough for about an hour.

Using a small cookie scoop, scoop out a ball of dough.


Press into mold making sure its not too thick on the bottom.


When your molds are filled put them on a cookie sheet and bake from 12-15 minutes. I always turn my cookie sheets 1/2 way through cooking time for more even baking. They should be slightly browned around the edges.


Remove the tins/cookies from the cookie sheet and put them on a cooling rack upside down. Let them cool for about 4 minutes tap bottoms lightly with a knife and cookies should come right out.


If you don't have many molds you will have to wait for the molds you used to compleatly cool before you do the next batch so make sure you have plenty of molds!

Store in an airtight container or put in the freezer till you need them. Makes about 40 cookies.

Links to molds:

Shinny Molds

More shinny molds

Non stick mold set

Tuesday, November 8, 2011

The Goro Experiment

This year I broke a tradition of not traveling on Labor Day weekend. I hate the traffic and all the crazy drivers...but I was offered a chance to take a bus to Scan Fest in Vasa Park at Budd Lake, NJ. The last time I was there my daughter was about a year old...she is now 25!  Anyway while I was there I found a Goro Iron and it was on sale for half price! I have wanted a Goro iron for a few years now so I was really excited at my find.


 I only had made Goro once a few years ago when I borrowed an iron from a friend at the Son's of Norway. So now I was on a quest for a good recipe for Goro! I found one again  by , on about.com.
 A direct quote form Ms. Diehl  "So few people cook Norwegian goro "crackers" nowadays that they can become a signature gift for cooks who take the time to bake them for friends and teachers during the holidays. They are sort of a cross between a cookie, a cracker, and a waffle – not too sweet, and quite possibly the most beautiful of all Scandinavian baked goods."


So I set out to try her recipe. I made a few changes but I think this is the one I will be using.


Norwegian Goro – Cardamom Crackers


Prep Time: 20 minutes


Cook Time: 10 minutes

Total Time: 30 minutes

Ingredients:

•3 eggs

•1 cup sugar

•1 Tbsp. vanilla sugar (or 1 tsp. vanilla)

•1 cup whipped cream, whipped to firm peaks

•1 cup butter, melted

•2 Tbsp. brandy or cognac ( it is listed as optional but definitely add it)

•6  cups all-purpose flour

•1 tsp. freshly ground cardamom
Preparation:

Trace a rectangular pattern the same size as your goro iron onto parchment or other paper; cut out. Spray goro iron lightly with cooking spray and heat, closed, over medium-high burner until a drop of water sizzles on the surface when opened.


Beat together three eggs, sugar, and vanilla sugar (or vanilla). Fold in whipped cream and melted butter. Stir in cognac, if using. Sift together 6 cups of flour, cardamom and cinnamon, then mix into batter. Add additional flour, if needed, until dough is very firm (it should be about the consistency of pizza dough).

Separate the dough into thirds. Refrigerate the dough you are not using. Take the 1/3 of the dough and roll  on a  lightly floured surface to a 1/8" - 1/16" thickness( I found 1/8 to be a bit thick) Place paper pattern on dough and cut squares the size of your goro iron. Stack keeping separated with wax paper and put in refrigerator. repeat with remaining dough.
Transfer each dough square to the goro iron, close iron, and cook the first side for approx 2 to 2.5 minutes,pressing the iron's handle together lightly to impress pattern upon the cracker . Flip iron and cook for an additional 2- 2.5 minutes, until both sides of cracker are golden brown. If you are rolling out to 1/16 I would check the cookie at one minute. This is just a guide to cooking times it all depends on the thickness you roll them out to and the temp you are cooking them at.

Transfer cracker to rack to cool;immediately, cut into the individual sections and trim off outside edges (if desired). Repeat process with remaining dough till all cookies are done.
Freeze or store in an airtight container.

Yield: Approx. 48 goro cookies.


The link to the orginal recipe by Kari Diehl: http://scandinavianfood.about.com/od/cookierecipes/r/Goro.htm

Monday, November 7, 2011

Pebernødder - Danish Pepper Nuts

Last year a customer at the Bazaar was looking for Pebernødder. I asked her what it was as I had never heard of it. She explained to me it was a Danish cookie some what like ginger bread. So of course I decided to add it to this years list of things to bake. So then the quest for a recipe...I went through my cook books but ended up settling on a recipe from about.com. So Thursday night when I came home from work was Pebernødder baking night.

This recipe, as with many Scandinavian cookie recipes, calls for hartshorn which is a leavening ingredient. I did have some but it was old and unusable thank goodness there is a German Deli in town and they did have it. The last time I bought it was at Ikea which is quite a drive and I wasn't even sure if they carried it anymore. If you don't have heartshorn/hornsalt you can substitute a baking powder and baking soda mix. If you want to know more about it click on the link. http://www.godecookery.com/cookies/infoba.html

So they were a success. My son went crazy over them so today I am baking a batch just for him! This will definitely be an addition to my Christmas Cookie list.

Pebernødder - Danish Pepper Nuts

Prep Time: 20 minutes


Cook Time: 8 minutes

Total Time: 28 minutesIngredients:

•1 cup butter, room temperature

•1 cup packed brown sugar

•1 egg

•3 cups all-purpose flour

•2 tsp. hartshorn / baker's ammonia (or 1 tsp. baking powder plus 1/2 tsp. baking soda)

•1 tsp. freshly ground cardamom

•1/2 tsp. cinnamon

•1/2 tsp. ginger

•1/2 tsp. cloves

Preparation:

Preheat oven to 375º. Cream together the butter and brown sugar, stir in egg until well-blended. Sift together remaining ingredients, then mix into batter to form a stiff dough.
Pinch off handfuls,(small handfulls as they are easier to roll )of the dough and roll into 1/2"-thick snakes on a pastry mat or a lightly floured counter.  If you are using a pastry mat you do not need to flour they roll out great. Using  a sharp knife, cut each snake into 1/2"-long pieces (about the size of a hazelnut). Place pieces on an ungreased cookie sheet, separating them slightly, and bake for 8 minutes.


Yield: Lots (around 600 Danish Pepper Nuts).

The link to the orginal recipe: http://scandinavianfood.about.com/od/cookierecipes/r/peppernuts.htm

Sunday, November 6, 2011

Swedish Limpa Bread

Another bread people are looking for when they come to the Scandinavian Bazaar is Swedish Limpa Bread. In the past I was using an ABM recipe but again wasn't thrilled with the results. So this year I decided to give this recipe a try. There are many variations of this bread but I always made the one with the seeds. Again if you don't like them but want the flavor they give the bread you can finely grind them up of just leave them out. I added the orange zest as my original recipe called for it and I think it gives the bread a nice touch!


Swedish Limpa Bread

Ingredients:

2 cups orange juice

1/2 cup butter

1 1/3 cups dark brown sugar

1/4 cup dark molasses

2 1/2 teaspoons caraway seeds

2 teaspoons anise seed

Zest of 1 orange ( I use Penzey's Spices Orange Peel and rehydrate)

2 teaspoons salt

2 cups cold water

3 tablespoons yeast

4 cups rye flour (medium)

5 -6 cups all-purpose flour

1 egg whisked with 1 tablespoon milk for egg wash


Combine first six ingredients in a medium saucepan and bring to a boil; simmer for approximately 5 minutes.
Let cool some, then add the salt and cold water.

Test the temperature, it should be between 115-125 not any hotter! then add the yeast. Stir till yeast is dissolved.

Transfer to a mixing bowl ( I use my KitchenAid with the dough hook attachment) and add the rye flour and as much white flour as needed to make a soft dough. After all flour is Incorporated Knead well.  I did between 7 & 10 minutes with the KitchenAid. The bread dough will be sticky.


Let rise until double. Punch down and let rest 15 minutes.

Shape into 4 loaves (Traditionally in round loaves, but loaf pans work also).I use round cake pans because I prefer the round shapes. You can score the tops at this point if you want a design on the top of your loves.

Let rise again until double. About 1 1/2 hours.

Brush with the egg wash if you want a shiny crust!

Bake at 350 degrees F for about 30 minutes. I convection bake and found the bread needed to bake about 40 minutes just keep an eye on it and give it the thump test!

 If you are freezing any of the loves make sure they are completely cooled before freezing!

Here is the link to the original recipe: http://www.food.com/recipe/swedish-limpa-bread-136565

And here is the link to Penzey's Spices: http://www.penzeys.com/cgi-bin/penzeys/shophome.html

Here is a link to Baking911 great tips on bread making: http://www.baking911.com/bread/101_intro.htm

Norwegian Rye Bread

This recipe I found on the net...I had been using a bread machine recipe but wasn't happy with it...this is out of this world...if you don't like caraway seeds you can grind them up real fine or just leave them out...I'M not a caraway seed person but my husband is so the seeds go in!


Norwegian Rye Bread


Norwegian Rye Bread from A World of Breads by Doris Casella.


2 packages yeast ( 4 &1/2 teaspoons)

1/3 cup warm water ( about 115 degrees)

2 cups buttermilk

1 1/2 tsp salt

2/3 cup molasses

2 T caraway seed

1/3 cup butter, melted

2 cups white flour

2 cups rye flour

2 cups whole wheat flour

1 egg & 1 tablespoon milk ( for egg wash)

_____________________________________
• Dissolve the yeast in the warm water.

• Heat the buttermilk (I put it in the microwave for 30 seconds till 115 degrees).

• Add salt, molasses, caraway seed, melted butter and dissolved yeast to the buttermilk.

• Blend these ingredients and then start stirring in the flours gradually.

• Knead the bread until it is smooth and elastic.

• Place in greased bowl to rise. Takes about 1 1/2 hours.


• When the dough is doubled, punch down and let it rest between 10 and 15 minutes. Turn it out onto a floured board.

• Divide it into 2 parts. Shape each into a loaf and place in a greased loaf pan or a round cake pan if you are making round loves.

• Cover and let rise until doubled again - about 1 1/4 hours.

• Brush the top of the loaf egg wash.
• Bake in a 325 oven for 45 minutes until done.

It's beautiful and tastes rich and delicious.

For great tips on bread making try this site: http://www.baking911.com/bread/101_intro.htm

JuleKake

November not only brings the chilly weather it also brings our annual Scandinavian Bazaar. This means lots of baking to keep all our customers happy with all kinds of home baked goodies. A favorite is Julekake. Julekake means Yule Cake or Christmas Cake. This recipe came from my Mom who got it from a nice Norwegian lady. This is a yeast recipe. My mother-in-law made a version of Julekake that contains baking powder not yeast, that recipe is for another day.


JuleKake

I use the Kitchen aide for this!!!!!!!!! ( A note from my Mom)

21/2 c flour
2 pkgs yeast
1 1/2 tsp cardamom Mix together in bowl with flat beater
1 1/2 c milk
1/2 c sugar
1/2 c butter
1 scant tsp salt          Mix together and heat to 115 - 125 Beat into flour with flat beater for 2 mins speed 2
1 egg                        Add and beat additional 2 mins flat beater

Change to dough hook

2 - 21/2 c additional flour
1 - 2 cups candied fruit ( I use 1 1/4 cup)
1 c golden raisins Knead 7 - 10 mins

Place in greased bowl and let rise until double approximately 2 hours
Punch down and let rest 10 - 15 mins

Shape ino 2 - 3 round loaves place into greased 9 inch round cake pans(for 3 loves) or greased cookie sheet

Let rise until double again about 1 1/2 to 2 hours

1 egg whisked with 1 Tablespoon milk.                         Brush with egg wash.


Bake 350 35 - 45 mins. You may have to cover loosly with foil Make sure they thump to determine if they are done.
Cool and ice for nicer presentation

If this is your first time working with yeast or making bread try this website for all kinds of tips. It’s great! http://www.baking911.com/bread/101_intro.htm

Tuesday, May 25, 2010

Very Flaky Pie Crust


Since it's pie season I figured I'd post my pie crust recipe. This is my regular pie crust that I make in a few batches and freeze so I always have a pie crust when I need it. This is a great recipe and so easy to roll out.
Very Flaky Pie Crust


Makes 4, 9" crusts or 3, 10" crusts.

Ingredients:
4 cups unsifted flour
1 Tlbs sugar
2 tsp salt
Crisco
1 egg

1 Tlbs cider vinegar
1/4 cup water
1/4 cup vodka ( you can use another 1/4 cup water in place of the vodka.)

In a large bowl mix together flour,sugar and salt. Add the Crisco shortening and mix with a pastry blender or 2 forks until crumbly.
In a small bowl mix egg,cider vinegar, water and vodka till combined. Add to flour shortening mixture. Combine till moist. Shape into a large ball.
Divide dough into thirds for 10" pastry. Divide dough into fourths for 8-9" pastry.
Shape each piece into a round disk and wrap individually in wax paper and chill at least 1/2 hour before using.
Dough stays for 3 days in the refrigerator and can be frozen for up to six months. If you are freezing wrap carefully and place in a Ziploc bag.

If a recipe calls for a baked shell roll out pastry place in pie pan , prick all over with a fork and bake at 450 degrees for 12-15 minutes. I always use my pie weights(chick peas) when I just have to blind bake a crust. This helps keep the pie shell from shrinking. After your pastry is in the pie pan put in a piece of parchment paper and fill with one bag(out of the plastic) of chick peas. bake for 10 minutes then remove the peas and parchment paper and continue cooking 2-5 more minutes. You can keep the chick peas in a plastic zipper bag and reuse them next time you need to blind bake a pie shell.